
Unlocking the Hidden Potential of Mail Merge: Discover 4 Essential Applications

Unlocking the Hidden Potential of Mail Merge: Discover 4 Essential Applications
Quick Links
- Creating Address Labels for Your Wedding Invitations and Christmas Cards
- Writing Individualized Reports
- Writing Job Application Cover Letters
- Designing Certificates
Mail merging in Microsoft Word is well known for letting you create and send personalized versions of the same email to lots of people in one go. However, the tool also has some practical everyday uses that could make your home and work life a lot easier.
In short, mail merge lets you create a document in Microsoft Word that you can personalize with individualized details , such as people’s names. There are two ways to do this—you can create the list of personalized variables within Microsoft Word’s mail merge feature itself, or you can create the list in another program, such as Excel, and then import the details from that list into Word.
In this article, we will show you how to use mail merge in Microsoft Word alongside Microsoft Excel, since creating comprehensive lists and databases in Excel is easier to do and manage.
Mail merge is currently not available in Word for the web—you will need to subscribe to Microsoft 365 and use the Microsoft Word desktop app to use this tool.
Creating Address Labels for Your Wedding Invitations and Christmas Cards
While enjoyable, sending wedding invitations or Christmas cards can take time, and it’s easy to make mistakes, especially if you’re writing the addresses on the envelopes by hand. This is why you should use Microsoft Word instead. When you’re done, you can either print the names and addresses onto label paper, or use normal paper and glue, before cutting out the individual labels to stick to your envelopes.
Start in Excel by creating your list of names and addresses. Make sure you put each line of each person’s name and address into separate columns, and use headings across row 1. Also, ensure that you populate all cells, as leaving blanks will cause issues with your mail merge down the line.
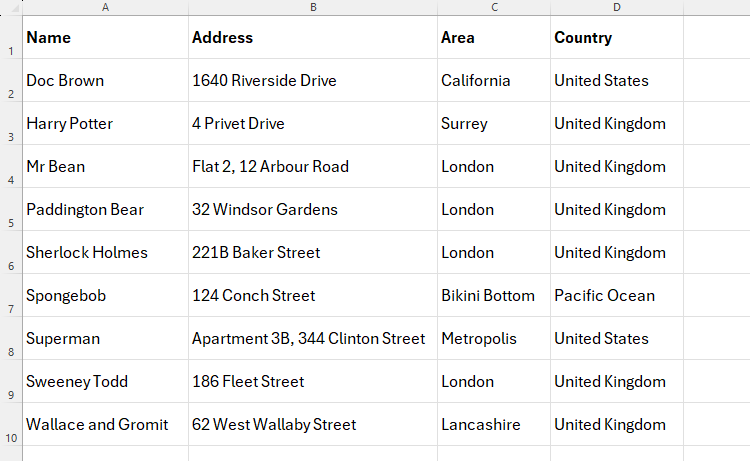
Then, press F12 to name and save your document in a memorable place on your computer.
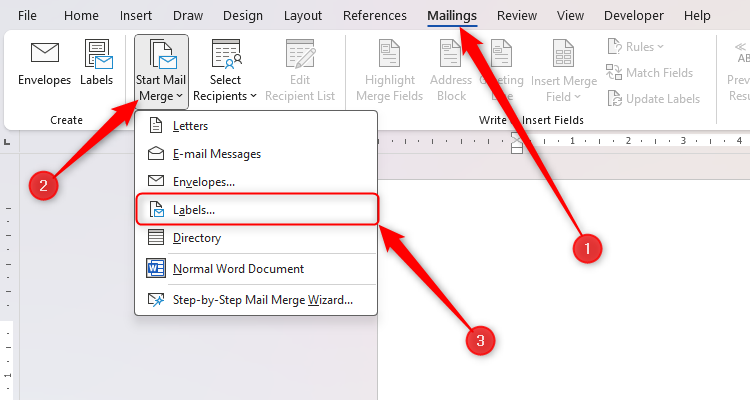
Now, open a blank Word document, and click Mailings > Start Mail Merge > Labels.
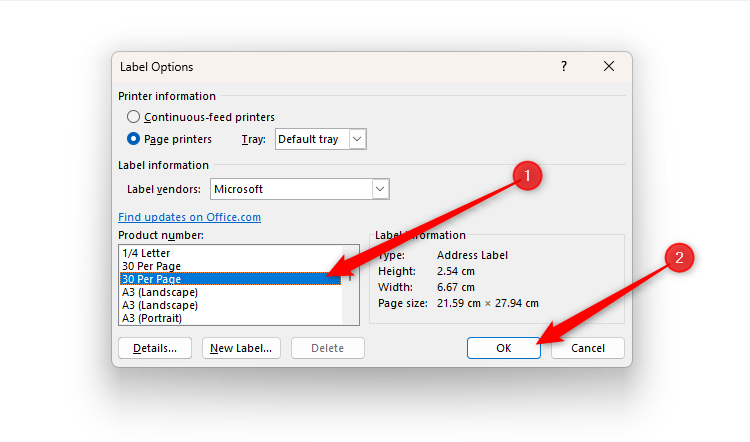
To save paper, scroll down to and select “30 Per Page,” and click “OK.”
Turning on the Show/Hide (¶) option in the Home tab will help you see the layout and positioning of the labels you have just created.
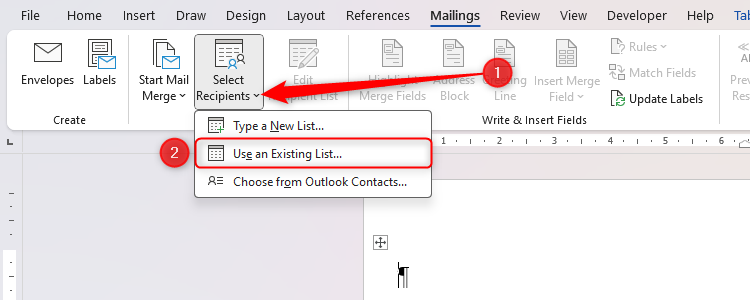
The next step is to import the address list that you created in Excel. To do this, with the Mailings tab still open, click Select Recipients > Use An Existing List.
Use the Select Data Source window that opens to locate the Excel file containing the names and addresses, and click “Open.” In the Select Table dialog box, check the checkbox that tells Word that you’ve used headings in your Excel table, and then click “OK”.
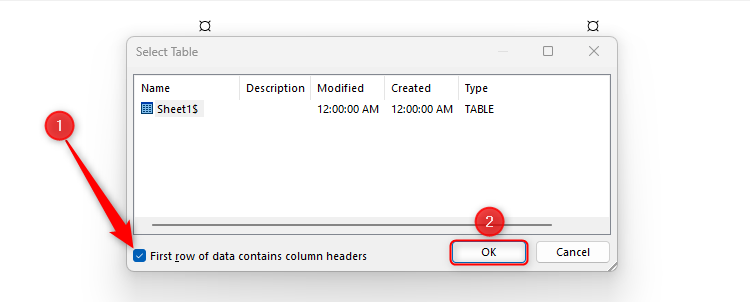
Word is now ready to pull the data across from Excel.
Click “Insert Merge Field,” and see that the headings you created in Excel are listed in the drop-down. Start by clicking the item you want to appear on the first line of the address label (“Name”), and then press Enter. Repeat the process for each line of the address label, making sure you press Enter between each one.
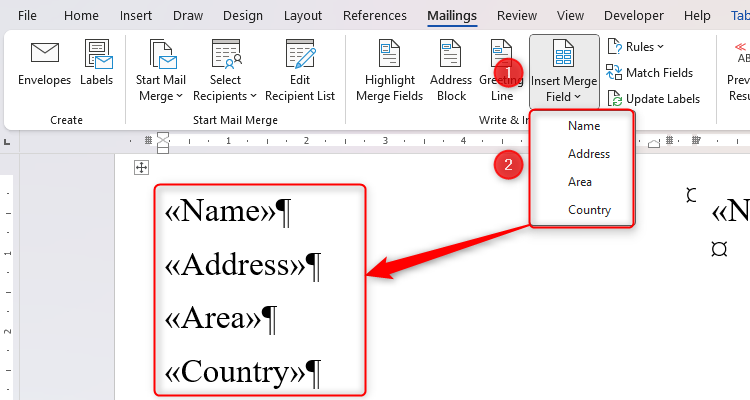
If the text runs over the space provided for the labels, increase the label sizes by clicking and dragging the bottom of the label row downwards, then remove any labels that move to the next page .
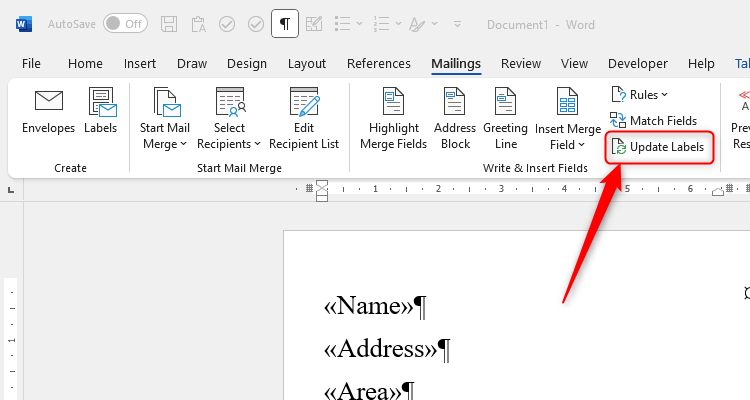
When you have inserted all merge fields, click “Update Labels.” This will apply the merge fields you just added to each of the labels in your document.
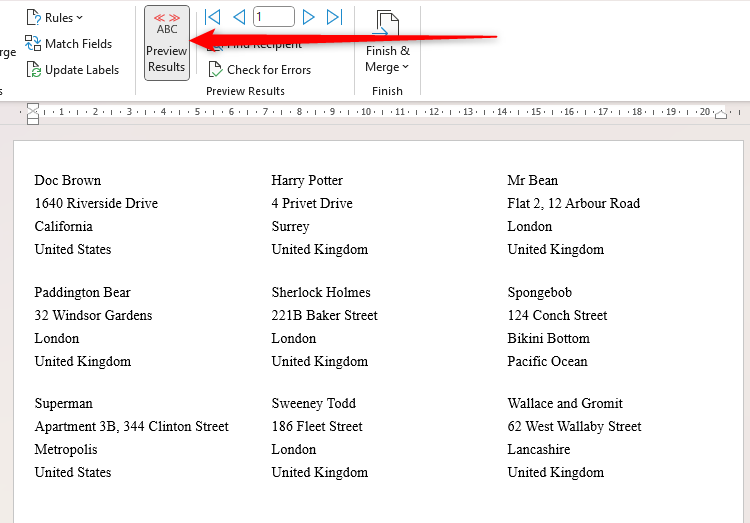
Now, click “Preview Results” to check you’re happy with how your labels look.
To complete the process, click Finish And Merge > Print Documents.
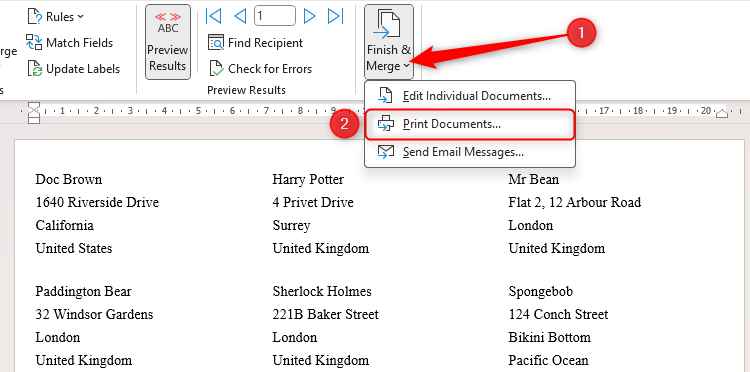
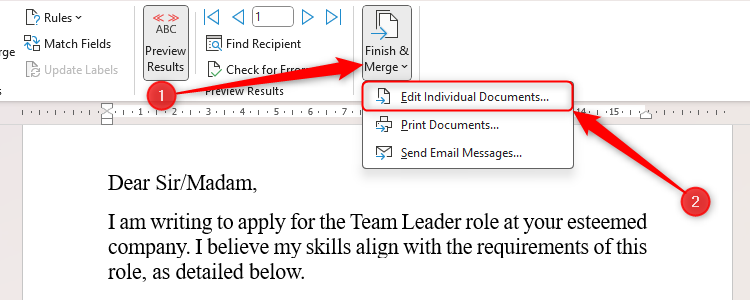
If you want to make changes to individual addresses, click Finish And Merge > Edit Individual Documents. This will open the labels in a new document, where you can make changes without affecting the other entries.
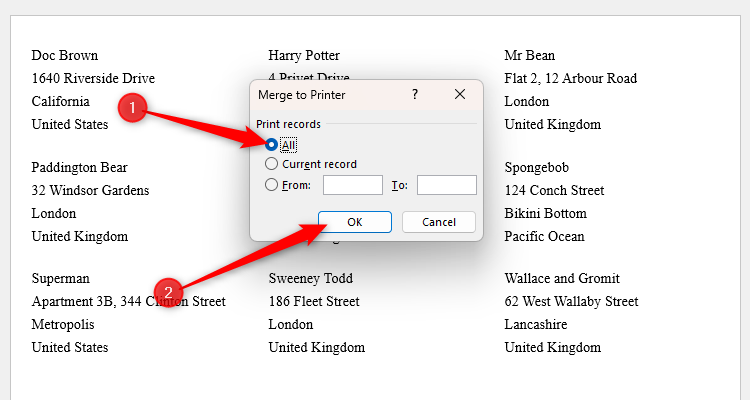
Then, ensure “All” is selected, and click “OK” to print.
Finally, cut up your labels and stick them onto your envelopes!
Writing Individualized Reports
While the example we’re going to use will be for teachers writing school reports, the same process can be used in many different roles and professions, such as surveying, assessing, managing, and reviewing.
In a Word document, type the foundation of the report, using “[NAME]“ where a person’s name will go, and “__“ wherever an individualized part needs to be added.
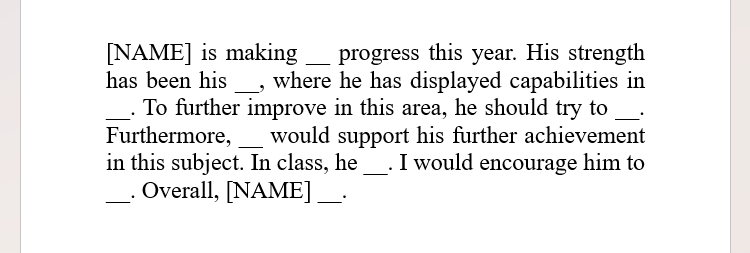
Then, copy each sentence into a cell across row 1 of an Excel sheet, making sure you add a “Name” column at the start.

Then, fill in the gaps under each column for each report you want to generate, before pressing F12 to name and save the spreadsheet in a memorable location.

Now, return to your Word document. In the Mailings tab, click Select Recipients > Use An Existing List.
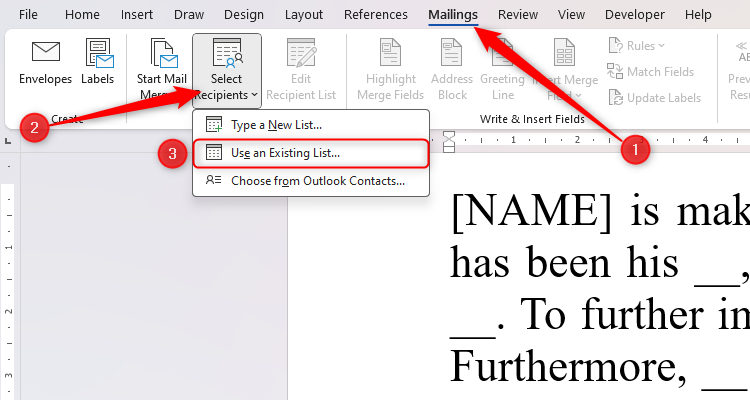
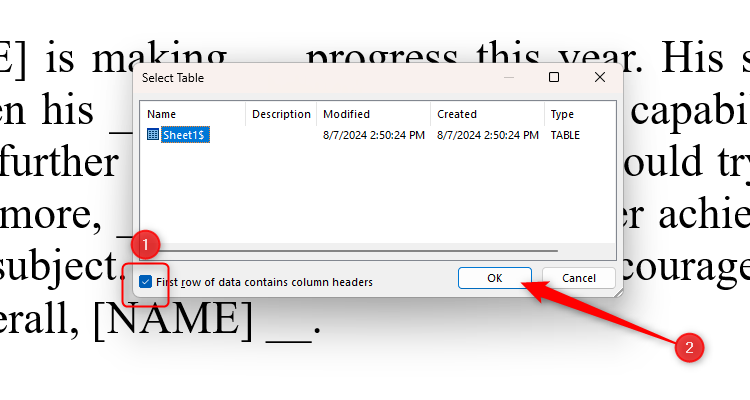
In the Select Data Source window that opens, locate the Excel sheet containing the report details, and click “Open.” Then, in the Select Table dialog box, check the checkbox that tells Word that you’ve used headings in your Excel table, and click “OK”.
Now, select the areas where you used [NAME] or inserted blanks in your Word document, click “Insert Merge Field,” and choose the appropriate field via the “Insert Merge Field” drop-down to add it to the sentence.
![A report in Word, with [NAME] selected, and the relevant field from the Insert Merge Field drop-down selected.](https://static1.howtogeekimages.com/wordpress/wp-content/uploads/2024/08/a-report-in-word-with-name-selected-and-the-relevant-field-from-the-insert-merge-field-drop-down-selected.png)
After you have assigned all the fields from Excel, click “Preview Results” to see the first report. You can also use the arrows to flick through all the reports if you wish.
![]()
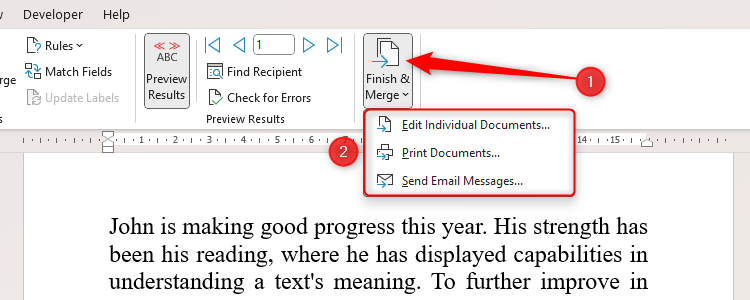
Finally, click “Finish and Merge,” which gives you the option to review and amend the documents individually, or print the reports you generated.
Writing Job Application Cover Letters
It can be frustrating to regurgitate the same information in various cover letters for the many jobs you might apply for. After all, the skills you have can be applied to many different roles. This is where mail merge comes into play.
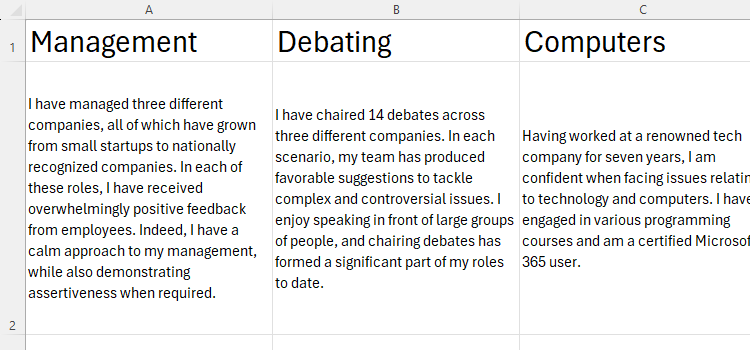
Across row 1 in a blank Excel worksheet, type the different skill categories you fall into.

In row 2, underneath each skill, write a few sentences demonstrating your possession of that skill. These sentences will ultimately be exported into your cover letter, so make sure you write them with this in mind.
Once you have finished detailing your skills, press F12 to name and save the workbook. You can go back in and add to or amend the details in this sheet at any time.
Next, when you’ve found a job you want to apply for , open a new Microsoft Word document, and type the opening and ending of your cover letter. Then, in the Mailings tab, click Select Recipients > Use An Existing List.
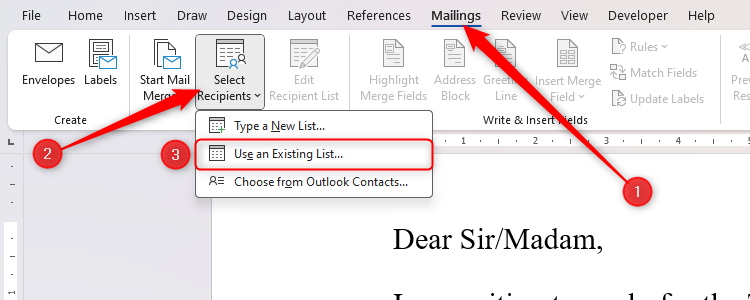
In the Select Data Source window that opens, locate the Excel sheet containing your skills, and click “Open.” Then, in the Select Table dialog box, check the checkbox that tells Word that you’ve used headings in your Excel table, and click “OK”.
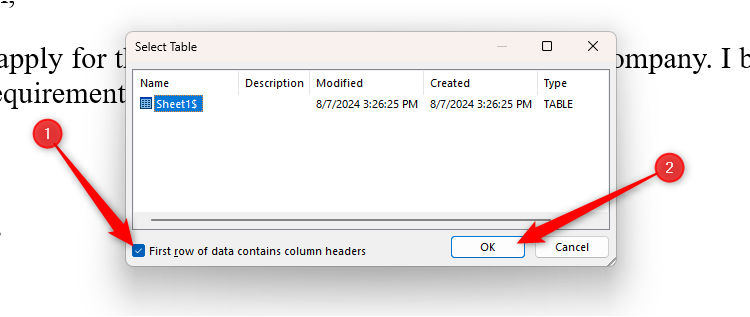
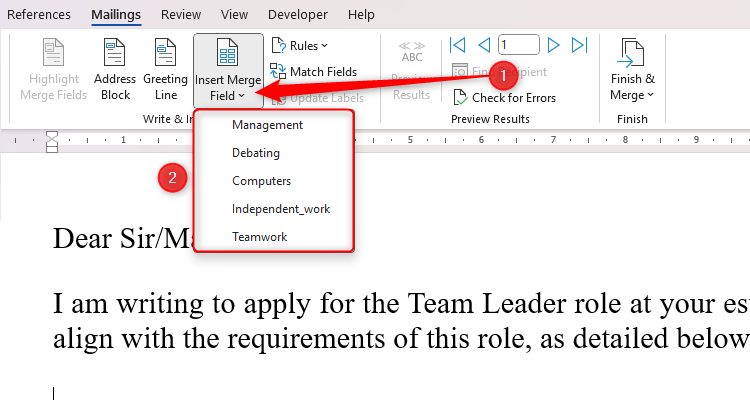
Then, click “Insert Merge Field,” and choose the job skill that you detailed in your Excel spreadsheet.
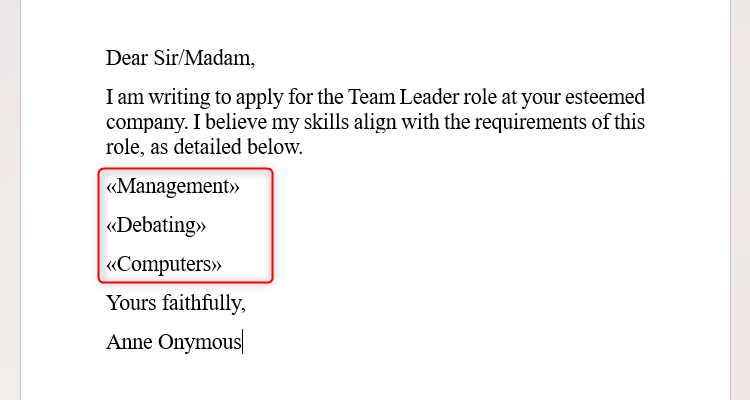
You will then see a placeholder indicating that the text will appear in that position when you complete the mail merge.
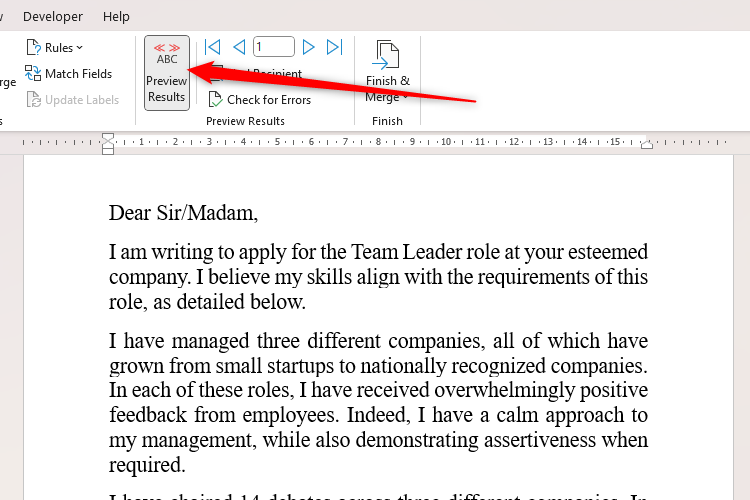
When you have added all your skills, click “Preview Results” to check that you are happy with the structure and order of your paragraphs. If not, you can select and reorder your text.
Inevitably, you will want to amend the wording here and there to ensure that the letter is coherent. Using the mail merge technique described in this article forms the basis of your cover letter, but you should always check it through to ensure it runs smoothly. To make changes, click “Finish And Merge,” and select “Edit Individual Documents.” After you click “OK,” your completed cover letter will open in a new document, which you can then amend and save as necessary.
Designing Certificates
Whether you run a local football team or a kids’ activity center, you might want to create certificates for your participants.
First, create your list in Excel, including things like the recipients’ names, scores, standards, and whatever other individualized details you want to include. Then, press F12 to name and save these details.
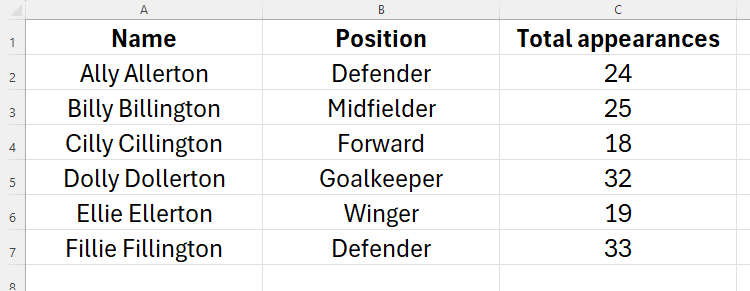
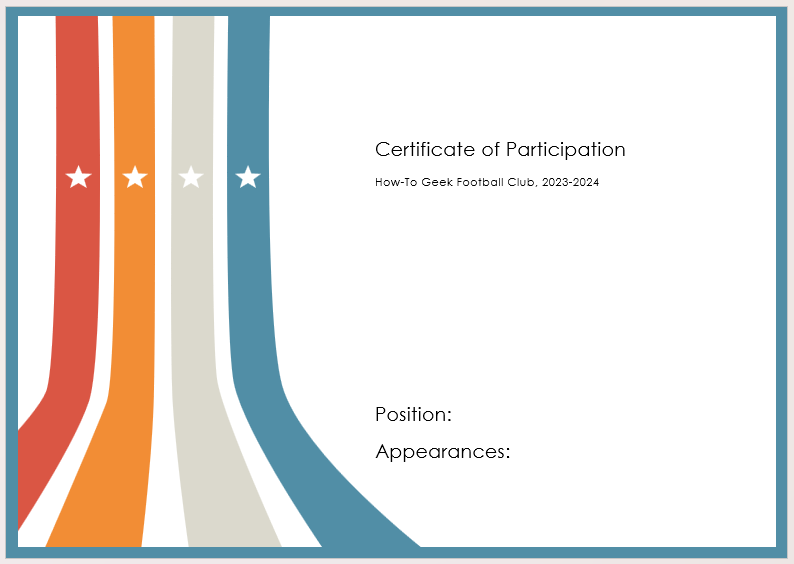
Next, design your certificate in Microsoft Word. If you prefer, you can use a template by clicking File > Home > More Templates.
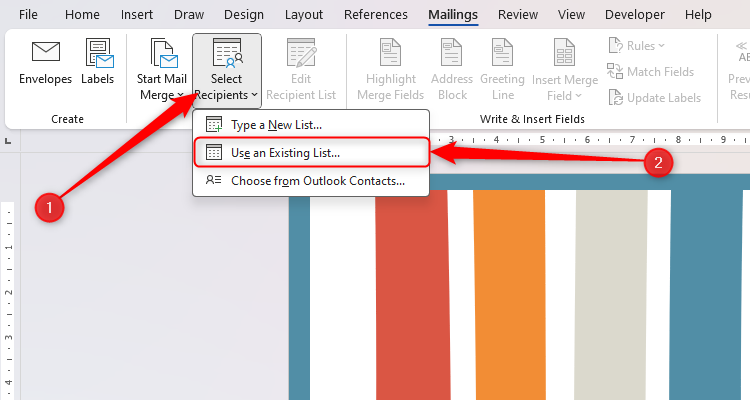
Now, in the Mailings tab, click Select Recipients > Use An Existing List.
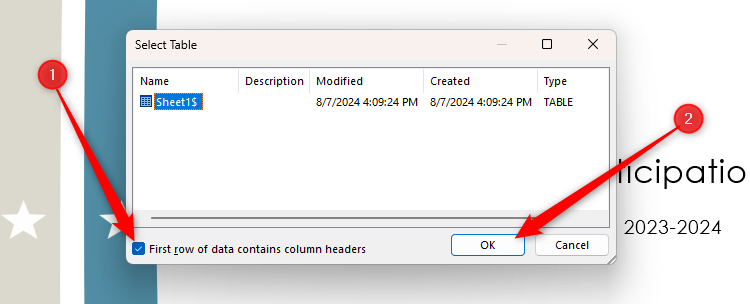
Locate the recipients’ details that you created in Excel, click “Open”, check “First Row Of Data Contains Column Headers,” and click “OK.”
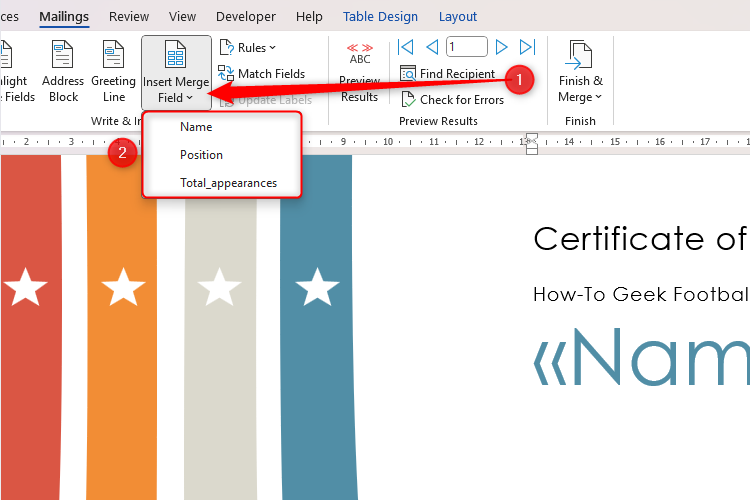
Then, click “Insert Merge Field” to add the fields from your Excel sheet to your Word document where appropriate.
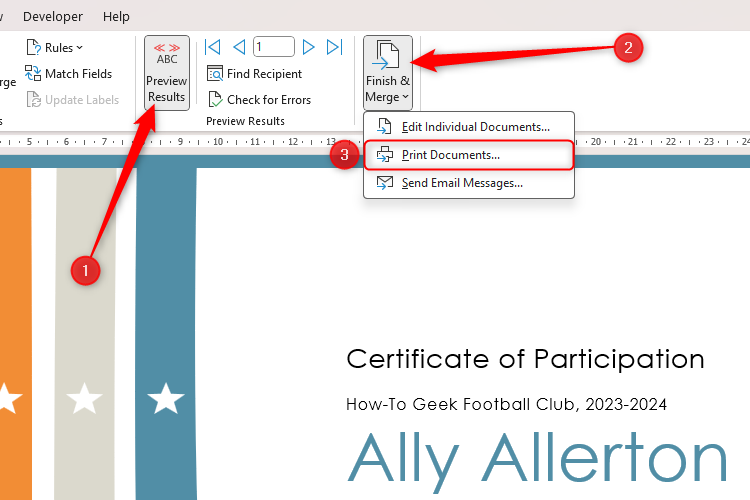
Before you finalize your certificates, click “Preview Results” to check that everything looks as it should, and then click Finish And Merge > Print Documents.
Now that you have some ideas for using mail merge for everyday tasks, check out some of our other little-known Microsoft Word tips .
Also read:
- [New] Bypassing Vimeo Top 10 Editing Software Choices
- [Updated] 2024 Approved Steps to Prevent Unplanned Recordings in QT
- [Updated] Humor Hub Picture Composer
- Banish Bootlessness: Solutions for Your Computer's Unplanned Shutdowns
- Come Trasformare Il Formato MKV in DVD Con Le Tecniche Di Conversione Più Efficaci per Windows & Mac
- Fortnite: Successfully Started Now
- How To Overcome the Windows Update Fiasco: A Guide to Solving Error 0X8024200d
- How to Play Your iPhone Videos Backward
- In 2024, Top 10 AirPlay Apps in OnePlus 11 5G for Streaming | Dr.fone
- Incompatibility with HDCP-Enabled Content? Here's How to Fix It
- Mastering Windows - Methods to Bring Back Offscreen Applications
- The Definitive Walkthrough for Correcting WinOS Error Code 0xC0000005
- The Spectacular Journey of Q500's 4K for 2024
- Troubleshooting Guide: Resolving 'Not Functioning' Oculus Air Link Issues in Windows
- Windows 11 Sleep Mode Perfection
- Windows Connectivity Breakthrough: Eliminate the Notorious 0X80aturage 0X800704CF Error
- Title: Unlocking the Hidden Potential of Mail Merge: Discover 4 Essential Applications
- Author: Anthony
- Created at : 2025-01-20 17:29:06
- Updated at : 2025-01-25 16:18:56
- Link: https://win-howtos.techidaily.com/unlocking-the-hidden-potential-of-mail-merge-discover-4-essential-applications/
- License: This work is licensed under CC BY-NC-SA 4.0.