
Unlocking Peak Performance for Gamers: Essential Tweaks for Windows 11 Systems
Deciphering and Resolving Error 0X80070091 for Successful System Restores in Windows 11 - Expert Tips

A lot Windows 10 users reported that system restore did not complete successfully. And the problem pop-uped asError 0x80070091shown as image above. It’s a good thing that Microsoft has noticed this error and will update this thread soon. However, if you are Windows 10 Advanced user, you can fix it right now via the methods below. If you’ve faced it, just go with the easy fixes below.
Disclaimer: This post includes affiliate links
If you click on a link and make a purchase, I may receive a commission at no extra cost to you.
Fix One. Rename the WindowsApps folder in Safe Mode
Boot your Windows 10 into safe mode:
How to:
a)
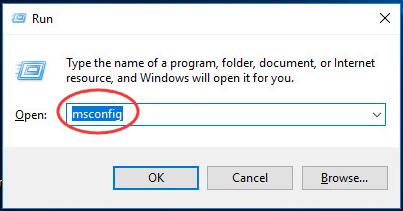
Open run dialog box by pressingWindows key + R key together.
Then type msconfig in the box and hit Enter.
b)
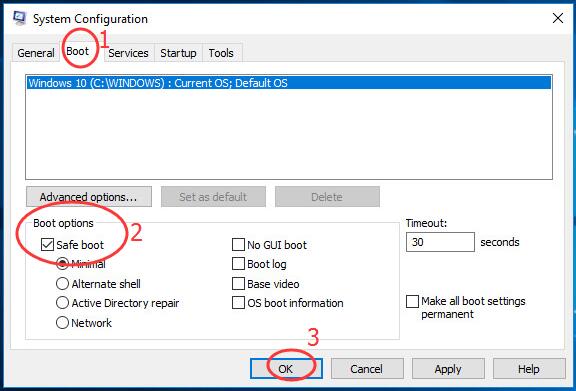
On the pop-up window, view on Boot pane.
Then tick on Safe bootand click OK.
Click Restart, if prompted by system configuration
Then your Windows 10 would get into safe mode.
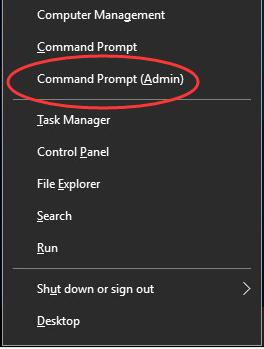
Open quick-access menu by pressing Windows key + X key.
Then click Command Prompt(Admin) to run it as administrator.
When prompted by User Account Control, click Yes.
Type the following commands and hit Enter to run them one by one:
• cd C:\Program Files
• takeown /f WindowsApps /r /d Y
• icacls WindowsApps /grant “%USERDOMAIN%\%USERNAME%”:(F) /t
• attrib WindowsApps -h
• rename WindowsApps WindowsApps.old
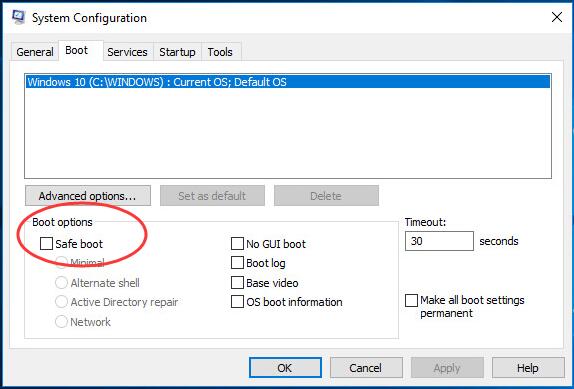
Follows the a) & b) of Step 1 to openSystem ConfigurationWindow.
This time uncheck Safe boot to reboot your Windows 10.
When it finish rebooting, run System Restore again.
Fix Two. Rename the WindowsApps folder in WinRE
Boot your Windows 10 into WinRE(Windows Recovery Environment)
How to:
a)
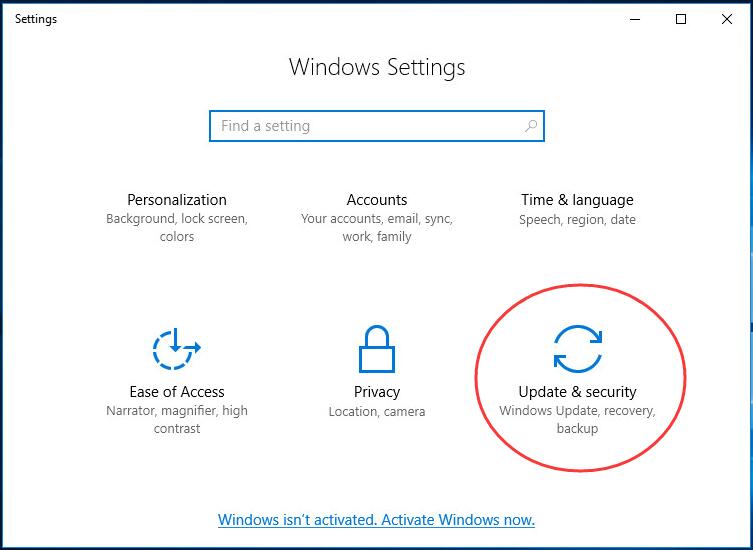
Open Settings Window by pressing Windows key + I key.
Then click Update & security.
b)
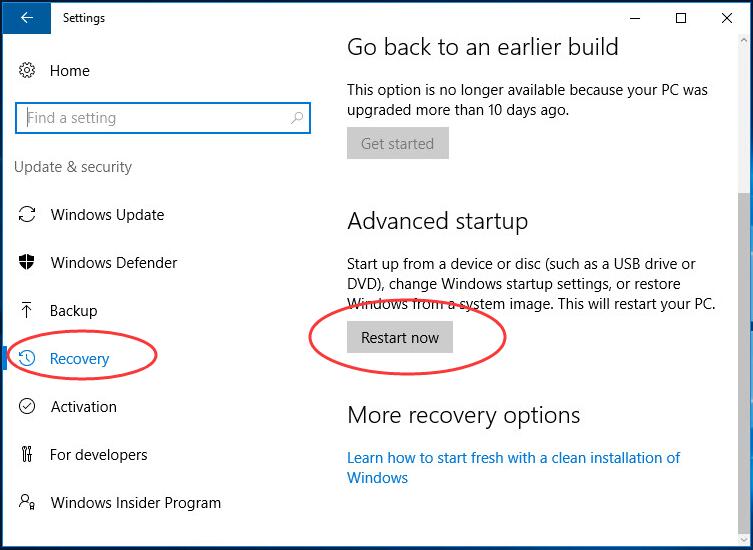
Click Recovery.
Then scroll down on the right side and click Restart now under Advanced startup .
c)
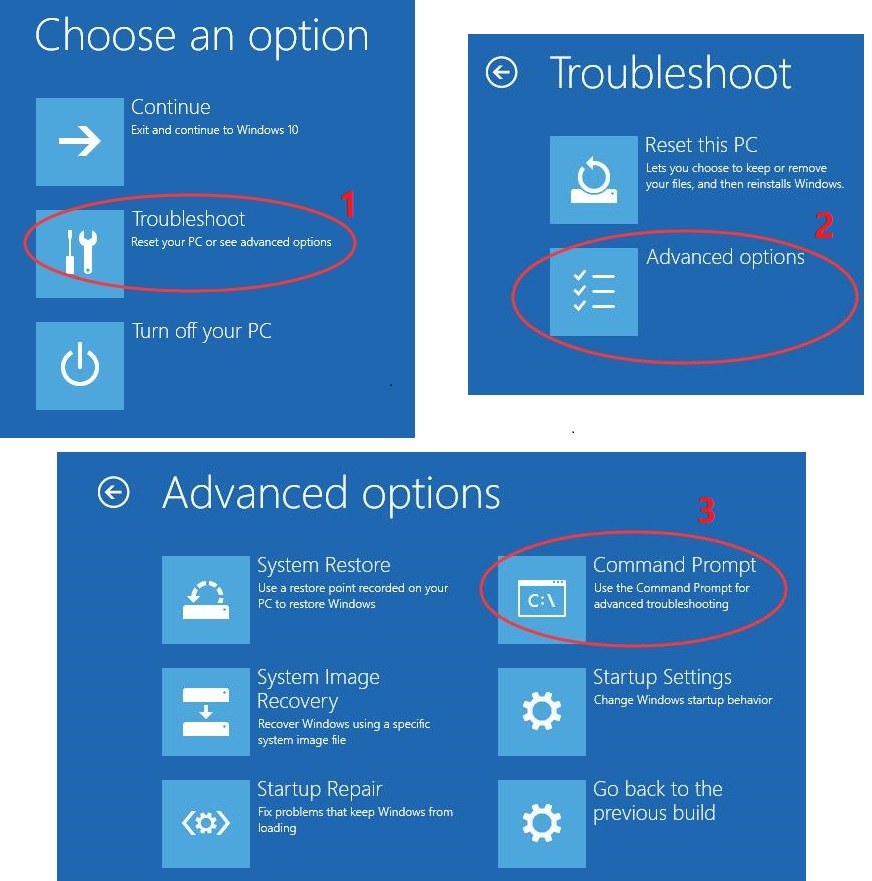
ClickTroubleshoot > Advanced >Command Prompt.
Type the following commands and hit Enter to run them one by one:
• cd C:\Program Files
• attrib WindowsApps -h
• rename WindowsApps WindowsApps.old
Reboot your Windows 10, then run System Restore again.
That’s it!
Also read:
- [Fixed] The Semaphore Timeout Period Has Expired. (0X80070079)
- [Updated] 2024 Approved From Novice to Pro Creating Impressive FB Covers
- AddROM Bypass An Android Tool to Unlock FRP Lock Screen For your Xiaomi Redmi Note 12 Pro+ 5G
- Convertissez Votre MPE en Fichier ACC Sans Frais : Un Outil Simple Et Reliable De Movavi Online
- Effective Strategies for Handling Sporadic Misidentified Results by Copernic
- How to Fix High CPU Usage by MsMpEng.exe in Windows 11
- In 2024, Will iSpoofer update On Honor X50 | Dr.fone
- New In 2024, Unleash Your Inner Animator Top Animation Software for Every Skill Level
- Quick Fixes for Hearthstone Performance Issues - No Hassle
- Resolving Microsoft Wireless Display Adapter Connections Errors on Windows 11 Systems
- The Best 8 VPN Hardware Devices Reviewed On Asus ROG Phone 8 Pro | Dr.fone
- Trouble with Your Corsair HS_50 Mic? Here's How to Restore Its Voice Recognition Functionality
- Title: Unlocking Peak Performance for Gamers: Essential Tweaks for Windows 11 Systems
- Author: Anthony
- Created at : 2025-03-01 17:40:20
- Updated at : 2025-03-05 17:04:15
- Link: https://win-howtos.techidaily.com/unlocking-peak-performance-for-gamers-essential-tweaks-for-windows-11-systems/
- License: This work is licensed under CC BY-NC-SA 4.0.