
Understanding and Correcting Microsoft's 0X80004005 Error: A Step-by-Step Tutorial
Troubleshooting and Correcting Error 0X80070091 During Windows 11 System Restore - Solved

A lot Windows 10 users reported that system restore did not complete successfully. And the problem pop-uped asError 0x80070091shown as image above. It’s a good thing that Microsoft has noticed this error and will update this thread soon. However, if you are Windows 10 Advanced user, you can fix it right now via the methods below. If you’ve faced it, just go with the easy fixes below.
Fix One. Rename the WindowsApps folder in Safe Mode
Boot your Windows 10 into safe mode:
How to:
a)
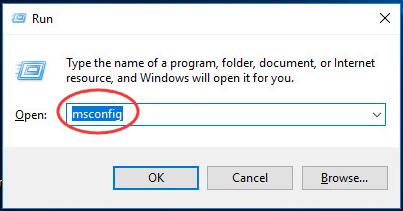
Open run dialog box by pressingWindows key + R key together.
Then type msconfig in the box and hit Enter.
b)
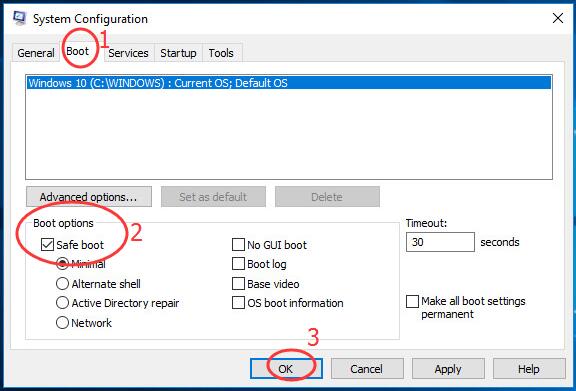
On the pop-up window, view on Boot pane.
Then tick on Safe bootand click OK.
Click Restart, if prompted by system configuration
Then your Windows 10 would get into safe mode.
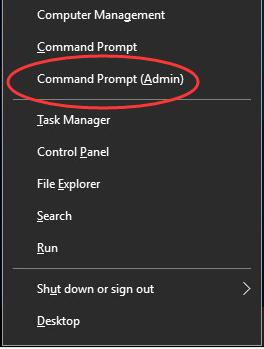
Open quick-access menu by pressing Windows key + X key.
Then click Command Prompt(Admin) to run it as administrator.
When prompted by User Account Control, click Yes.
Type the following commands and hit Enter to run them one by one:
• cd C:\Program Files
• takeown /f WindowsApps /r /d Y
• icacls WindowsApps /grant “%USERDOMAIN%\%USERNAME%”:(F) /t
• attrib WindowsApps -h
• rename WindowsApps WindowsApps.old
Follows the a) & b) of Step 1 to openSystem ConfigurationWindow.
This time uncheck Safe boot to reboot your Windows 10.
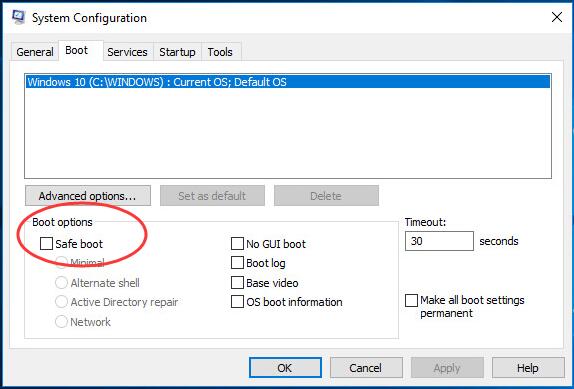
When it finish rebooting, run System Restore again.
Fix Two. Rename the WindowsApps folder in WinRE
Boot your Windows 10 into WinRE(Windows Recovery Environment)
How to:
a)
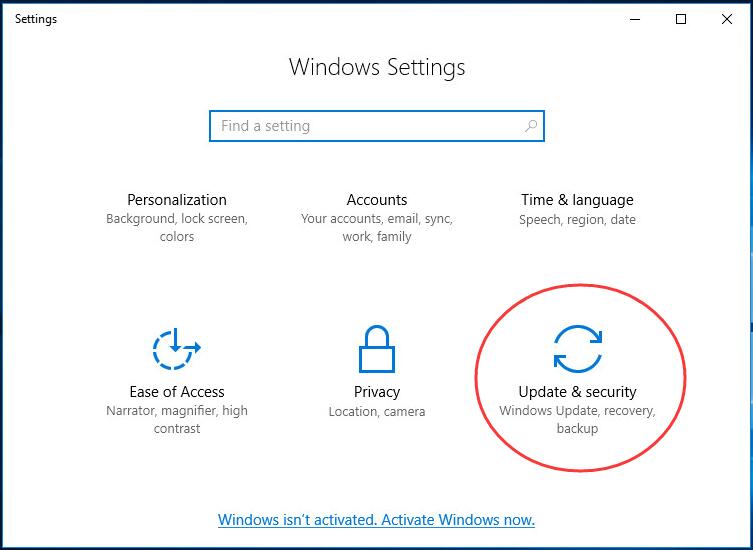
Open Settings Window by pressing Windows key + I key.
Then click Update & security.
b)
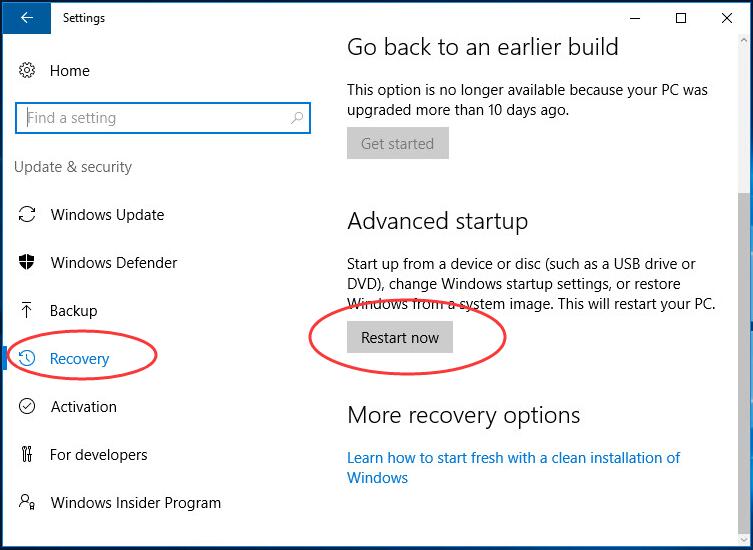
Click Recovery.
Then scroll down on the right side and click Restart now under Advanced startup .
c)
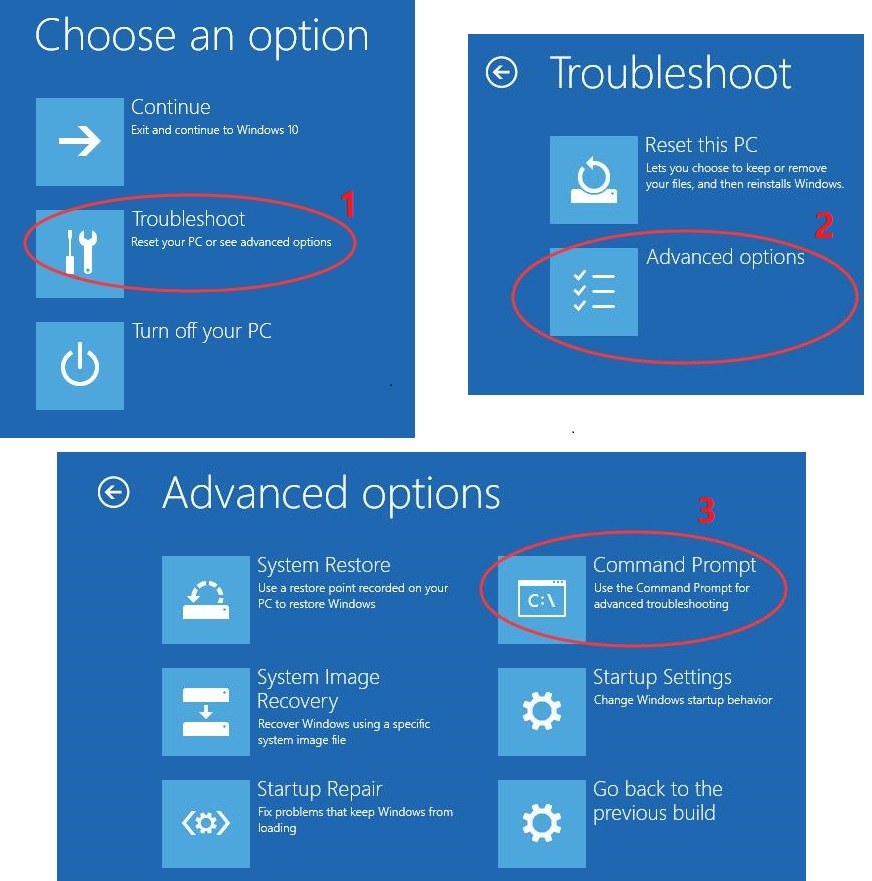
ClickTroubleshoot > Advanced >Command Prompt.
Type the following commands and hit Enter to run them one by one:
• cd C:\Program Files
• attrib WindowsApps -h
• rename WindowsApps WindowsApps.old
Reboot your Windows 10, then run System Restore again.
That’s it!
Also read:
- [New] In 2024, Exploring How YouTube Picks Most Engaging Comments
- [New] In 2024, HDR Reality Check Does Aurora Meet Expectations?
- Affordable Quality and Convenience Combined - Exploring the TP-Link Tapo S505 Smart Wi-Fi Light Switch
- AOMEI Backupper製品概要と関連用語解説
- Combining YouTube and iMovie for Professional Results
- How to Repair a Non-Functional Backspace Button on Your Computer
- In 2024, How to Bypass Android Lock Screen Using Emergency Call On Xiaomi Redmi Note 13 Pro 5G?
- IPhone用「ISOファイルの簡単な入力と再生方法」
- Library Loader L1-1 Not Found in System Files
- Tetap Desimalan Pintasan Dari Komputer Desktop | Pelaksanaa 6 Utama
- Troubleshoot and Fix werFault.exe Problems Swiftly – Expert Tips Inside
- Troubleshooting Your HP Laptop's Webcam Issue on Windows 11: A Step-by-Step Guide
- Title: Understanding and Correcting Microsoft's 0X80004005 Error: A Step-by-Step Tutorial
- Author: Anthony
- Created at : 2025-02-01 14:13:48
- Updated at : 2025-02-07 01:24:47
- Link: https://win-howtos.techidaily.com/understanding-and-correcting-microsofts-0x80004005-error-a-step-by-step-tutorial/
- License: This work is licensed under CC BY-NC-SA 4.0.