
Step-by-Step Troubleshooting Tips for a Constantly Disconnecting Mouse
Troubleshooting Persistent Booting Problems: Solutions Inside
Your computer gets stuck on the boot screen? This is very annoying – and quite scary. You’re probably thinking, I can’t even access the desktop! How am I supposed to fix it? But no worries, you can fix this. Here’s what you can do…
How to Fix the PC Stuck on Boot Screen Issue
- Solution 1: Boot your PC without Peripherals
- Solution 2: Check the RAM
- Solution 3: Reset BIOS Settings
- Solution 4: Restore your System to the Previous State
- Solution 5: Repair Corrupted System Files
- Solution 6: Perform a Fresh Install
You may not have to try them all; just work your way down the list until you find the one that works for you.
Solution 1: Boot your PC without Peripherals
External peripherals can sometimes conflict with your system and trigger errors of all sorts. So before we dive into anything deeper, let’s start with the easiest solution: restarting your PC without peripherals.
1) Press and hold the power button until your computer turns off.
2) Disconnect all peripherals (your printer, scanner, webcam, mouse, etc.).
3) Try turning on your computer again.
If your computer boots correctly, that means that one of the peripherals you removed is causing your problem. You should reinstall each device back into your computer and test them each time. Then, you’ll find the specific device that causes your problem. Replace the device once you’ve identified it. Or, consult the manufacturer of the device for assistance.
If your computer still can’t boot correctly, try the fix below.
Solution 2: Check the RAM
Your computer might be unresponsive during the startup process when your RAMs are not well installed, or in some cases, one or more of your RAM modules or RAM slots is faulty.
Press and hold thepower button until your computer turns off.
Open your computer case.
This process will vary depending on different types of computers. If you don’t know how to do it, consult your computer’s documentation or seek professional help.
- On your motherboard, remove your RAMs from the memory slots.
RAM looks like this:
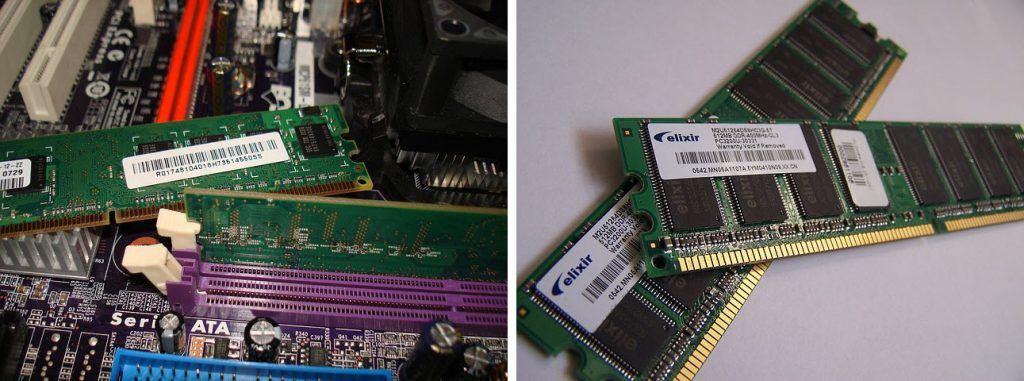
- Put your RAMs back into the slot one by one while trying to boot each time.
If your computer starts without one or more of the RAMs, then it could be an issue with your RAM modules. Or in some cases, it is possible that your RAM module is fine, but one or more memory slots on your motherboard are defective. You may want to try removing the modules and placing them in different slots to find if one of the slots is faulty.
If your computer still can’t boot properly, don’t worry. Check the fix below.
Solution 3: Reset BIOS Settings
When you’re booting up your computer, BIOS instructs it on how to boot up the operating system. And improper BIOS settings can cause computer boot issues.
You can reset your BIOS settings back to it’s original to see if that’s the issue for you. Here is how to do it:
Press and hold the power button until your computer turns off.
Disconnect the AC power cord from the power supply, and then open your computer case.
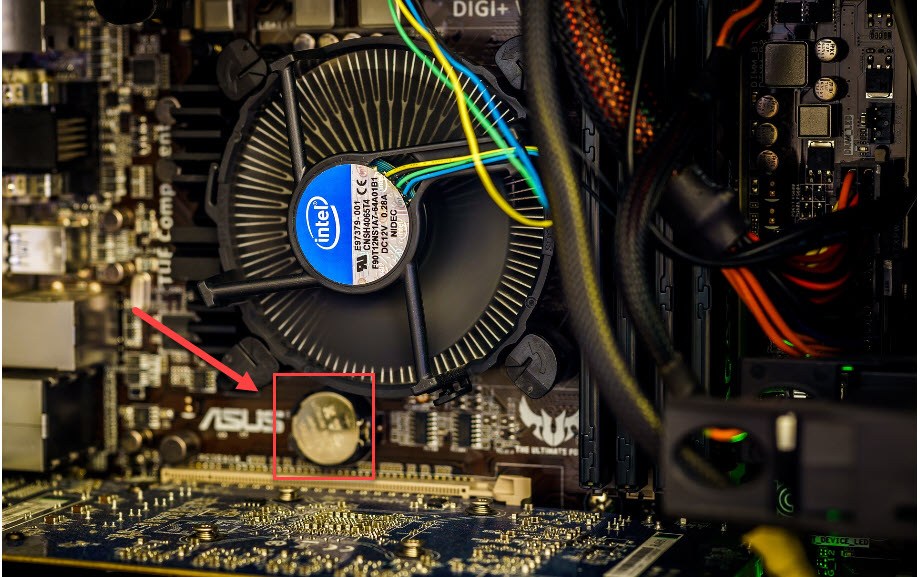
On your motherboard, remove your CMOS battery with your fingernail or a non-conductive screwdriver.
The CMOS battery looks like this
Wait for 5 minutes, and then reinstall your CMOS battery.
Connect the AC power cord to the power supply, and then turn on your computer to see if your problem persists.
Solution 4: Restore your System to the Previous State
If the issue happened because of a bad piece of software, say an app your installed or a driver that went wrong, you can use the windows build-in System Recovery feature to fix it. System Recovery allows you to roll your Windows installation back to its last working state.
To proceed, you’ll need to boot your PC into safe mode. If you don’t know how to do it, you can check our guide on How to start Windows 10 in Safe Mode .
Boot your computer into safe mode.
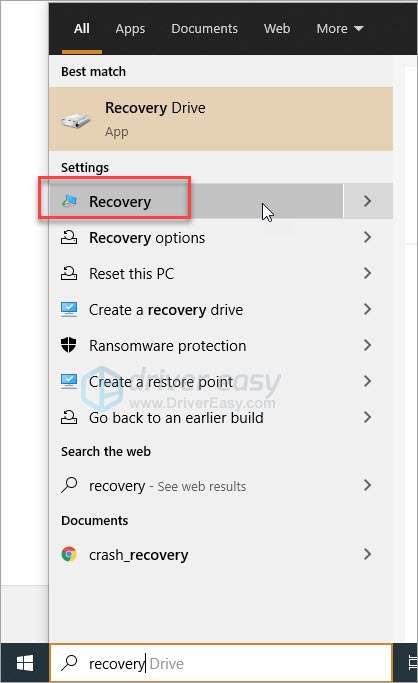
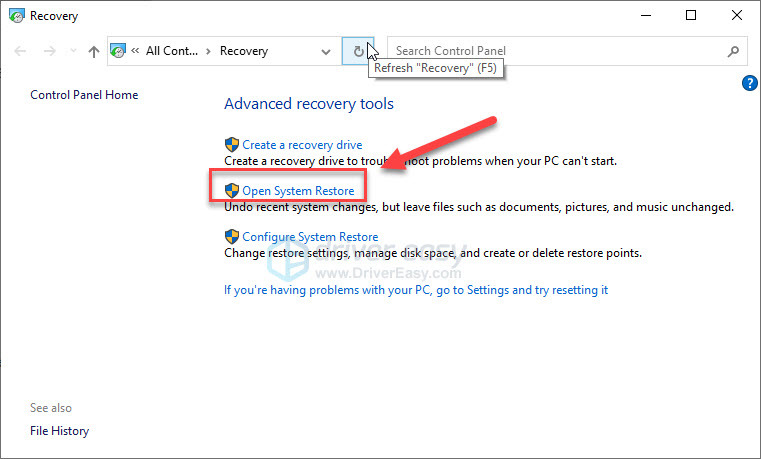
Type recovery in the search box on your desktop, and click Recovery in the list of results.
- Click Open System Restore .
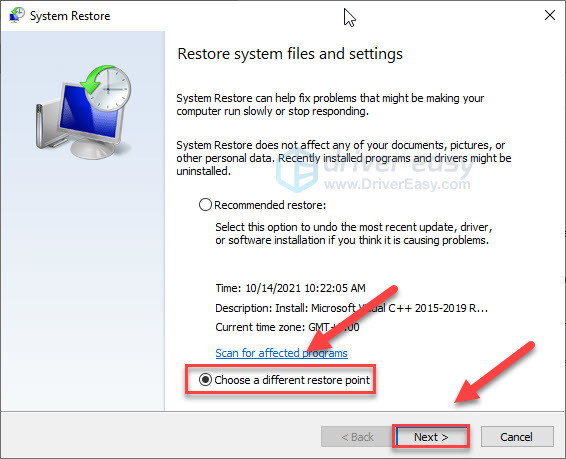
- Click Choose a different restore point , and clickNext to select a restore point before the issue occurs.
- Follow the on-screen instructions to finish the restore.
If you don’t have a restore point in System Restore, move on and try the next fix below.
Solution 5: Repair Corrupted System Files
Computer boot issues are likely to occur when certain system files get corrupted somehow. To see if there’s any broken or missing system files, there are two tool you can use:
- Option 1 – Fortect (Recommend) Use the Windows repair tool Fortect to fully analyze your computer environment and identify the cause of the monitor issues. This will deal with issues related to system errors and critical system files.
- Option 2 – Windows System File Checker Use Windows built-in tool System File Checker to check for corrupt, damaged system files and repair them. However, this can only help you fix issues related to major system files, and it won’t be able to help with issues caused by damaged DLL, Windows Registry key, etc.
To proceed, you’ll need to boot your PC into safe mode. If you don’t know how to do it, you can check our guide on How to start Windows 10 in Safe Mode .
Repair System Files with Fortect
Fortect specializes in Windows repair. It will fully scan your system environment and replace corrupted and deleted files with fresh Windows files from its updated online database.
In this way, you get an entirely fresh system with just one click and without losing any programs, settings, or personal data.
Download and install Fortect.
Open Fortect and run a free scan of your PC status. This may take a few minutes.
You can review a summary of the issues detected after the scan is finished.
If there’s any problem, you can click Start Repair to start the repair process. You’d need to buy the pro version (which comes with a 60-day Money-Back Guarantee) to unlock this feature.

The Pro version of Fortect comes with 24/7 technical support. If you need any assistance, please contact Fortect support:
Email: support@fortect.com
Run System File Checker
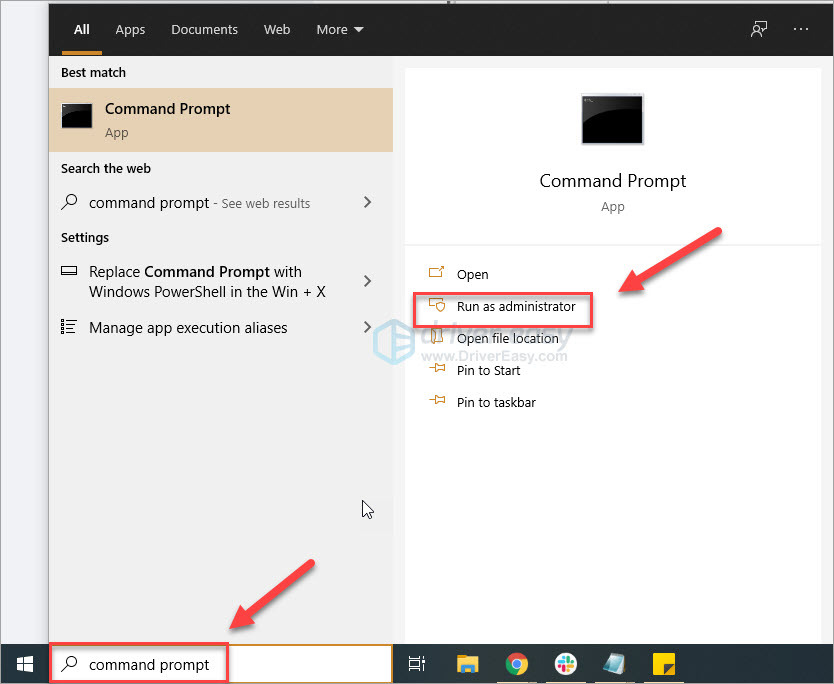
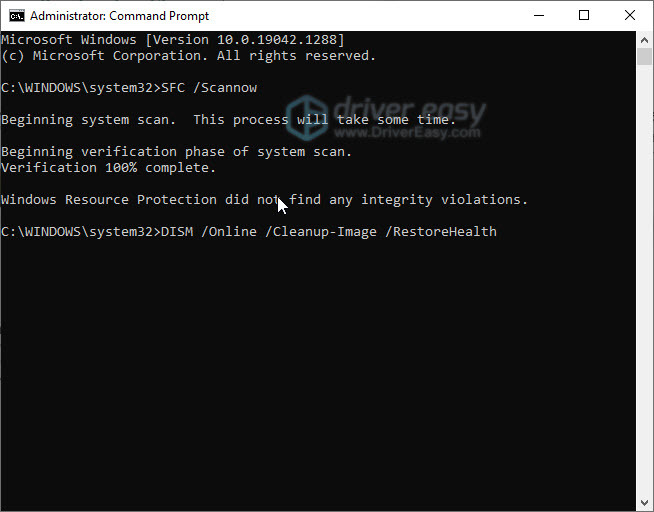
- On your keyboard, press the Windows logo ke y, type command prompt , then select Run as Administrator. (If Windows prompts for permission, click OK to continue.)
- Type SFC /Scannow , and then press Enter .
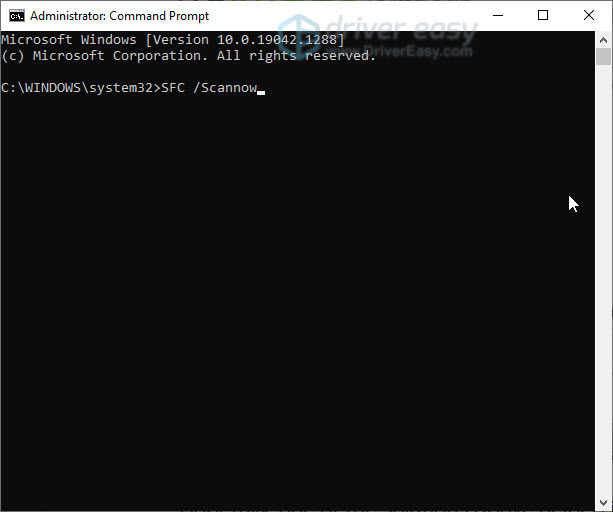
- Type DISM /Online /Cleanup-Image /RestoreHealth , and then press Enter .
Solution 6: Perform a Fresh Install
If none of the solutions works for you, you may have todo a clean reinstallation of Windows 10 . Note that this will wipe all files and data that you’ve stored on the computer.
Hopefully, this article helped! Please let me know which method helped you, or if you have a better idea on how to fix this issue. I would love your thoughts!
Also read:
- [New] Exploring the Capabilities of Yuneec’s Typhoon UAV
- [New] In 2024, 17 Transformative Metaverse Trials Explained
- [New] Influencer Insight Essential Hashtags for Maximum Impact for 2024
- [Updated] In 2024, Harmonious Hues Recording with a Mac
- [Updated] Mastering The Art Creating High-Quality Gopro Vlogs
- 3 Ways to Track Apple iPhone 12 mini without Them Knowing | Dr.fone
- Bluetooth Woes? Master the Art of Pairing Devices with Windows 10
- Economical PC Screen Grab Utilities for 2024
- Expanding Access to Secure Sign-Ins: Configuring Windows Hello Functionality on Excluded Devices Within the Windows 11 Ecosystem
- Fix the Constant Flicker: Stop Your Cursor From Blinking
- In 2024, How Can I Screen Mirroring Apple iPhone 13 Pro Max to TV/Laptop? | Dr.fone
- In 2024, Top 7 Skype Hacker to Hack Any Skype Account On your Xiaomi Redmi Note 13 Pro 5G | Dr.fone
- Mastering Windows Update Recovery Techniques for Smooth Operations
- Optimizing Your Gameplay Experience by Correcting Screen Distortion in Valorant
- Resolve Your Keyboard's Stubborn Silence on Windows Platforms (Win10, Win7, Win8)
- Troubleshooting Guide: Fixing Print Screen Issues on Windows 11 & 10
- Title: Step-by-Step Troubleshooting Tips for a Constantly Disconnecting Mouse
- Author: Anthony
- Created at : 2025-01-19 17:12:45
- Updated at : 2025-01-25 16:23:49
- Link: https://win-howtos.techidaily.com/step-by-step-troubleshooting-tips-for-a-constantly-disconnecting-mouse/
- License: This work is licensed under CC BY-NC-SA 4.0.