
Step-by-Step Guide to Troubleshooting Failed Feature Updates on Windows 10 Version 1607
Troubleshooting Persistent Loops in Windows 10 Automatic Repairs - Solved
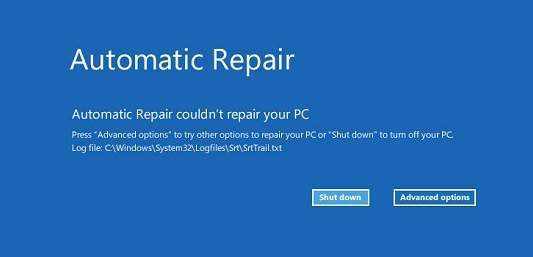
When you met boot error with Windows 10, you hoped that automatic repair will help fix the problem. But it got you more troubles. The worse thing is that repair process seems never end. Then what to do to end the loop? Read on to find the solutions.
Since the Windows keeps restarting, it is impossible for you access Advanced Options, that you can fix the problem there. In this case, you can boot from a USB or DVD.
To use the solutions below, you’ll need to prepare a bootable USB or a DVD with an installation file on it. If you are not sure how to create a bootable USB, refer How to Burn Windows 10 ISO to USB . Note you need to do this on another computer.
First start your PC from the USB or DVD and open Command Prompt
For USB bootable way:
Plug the USB the computer that has the problem.After you power on the computer, press function key, usually F2 or F12, to enter boot menu. The key to enter boot menu depends on the computers that you are using. You can go to the PC manufacturer’s website to check for it.
For DVD bootable way:
Insert the DVD to the computer that has the problem. Wait until you see the message “Press any key to boot from CD or DVD”. Press any key to continue. If you don’t see this message, you probably have to change the boot order in the BIOS (Basic Input/Output System) .
LearnHow to Boot from a USB Drive, DVD or CD .
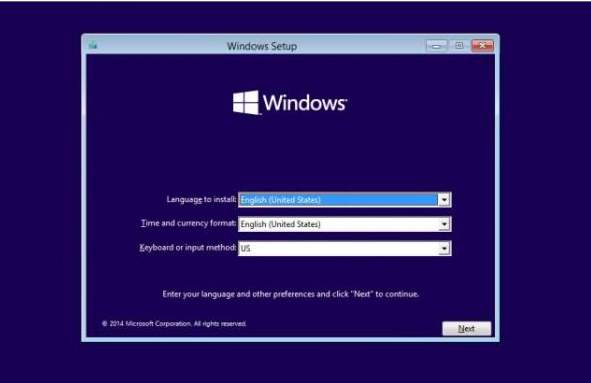
2. When you go to the setup screen, select the Language that you wish to use.
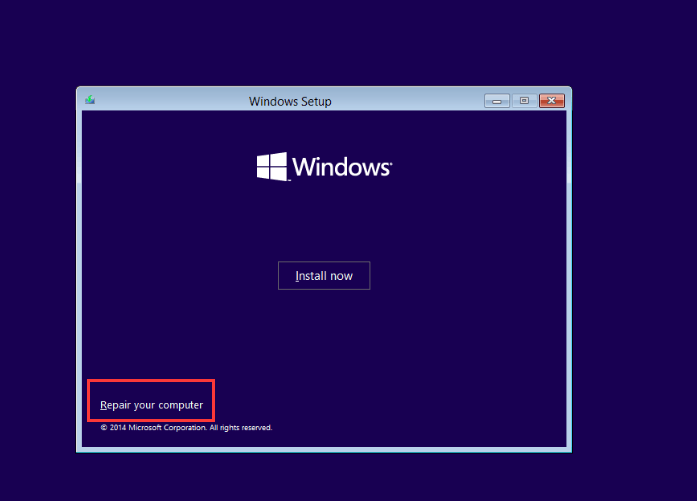
3. Then you will see the Windows Install screen, selectRepair your computer at the bottom left corner.
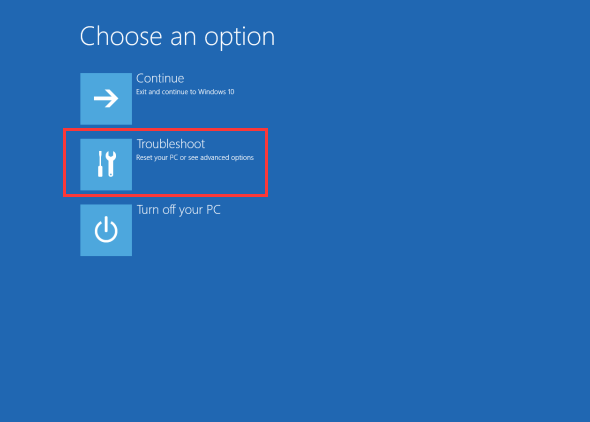
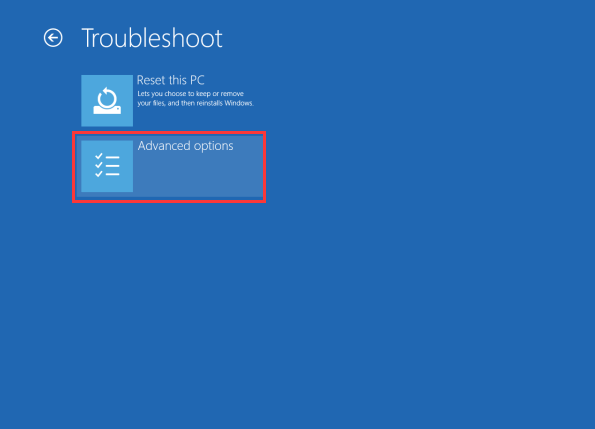
4. In Choose an option screen, selectTroubleshoot .
5. Then selectAdvanced options .
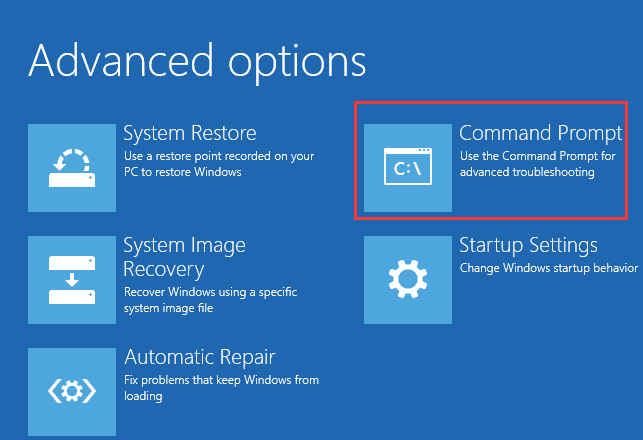
6. In Advanced Options screen, selectCommand Prompt . Then a new screen will be displayed with and open command prompt. If you are prompted to enter password, enter your Windows password.
After opening the Command Prompt window, use below solutions to fix the loop error.
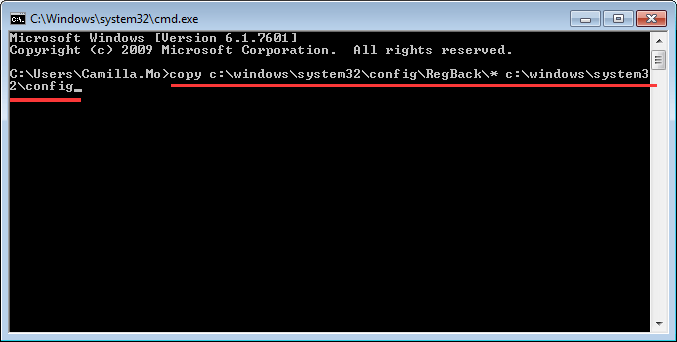
Solution 1: Restore Windows Registry
Follow these steps: 1. In Command Prompt, t ype copy c:\windows\system32\config\RegBack\* c:\windows\system32\config and hitEnter .
2. If prompted to overwrite existing files, typeAll and hit Enter .
3. Type exit and hitEnter to close the Command Prompt window.
4. Restart your computer.
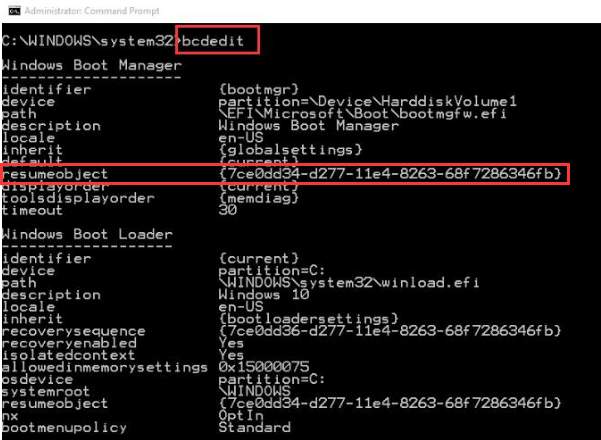
Solution 2: Disable Automatic Startup Repair
1. In Command Prompt, typebcdedit and hitEnter . Then you will see the result displayed. Look forresumeobject item and note the number next to it (In below case, the number is 7ce0dd34-d277-11e4-8263-68f7286346fb).
2. Type bcdedit /set GUID recoveryenabled No and hitEnter . Replace GUID with the number that you noted in last step. (For example, if the number is 7ce0dd34-d277-11e4-8263-68f7286346fb, the full command will be “bcdedit /set 7ce0dd34-d277-11e4-8263-68f7286346fb recoveryenabled No”)
3. Reboot your PC and Windows should start without no problem.
Solution 3: Remove Your RAM
The loop error can be fixed by simply removing the RAM. You can try this solution. Before removing, remember to turn off the PC.If you have more than one RAM, remove one at a time then start your PC without it. You might need to do this a few times until you test every RAM module.
After entering Windows, run a disk check to check if there is any problem with the disk, and run a system file check to check if some system files are corrupted. If neither of them work, try to restore Windows registry.
Run a disk check
Follow steps below:
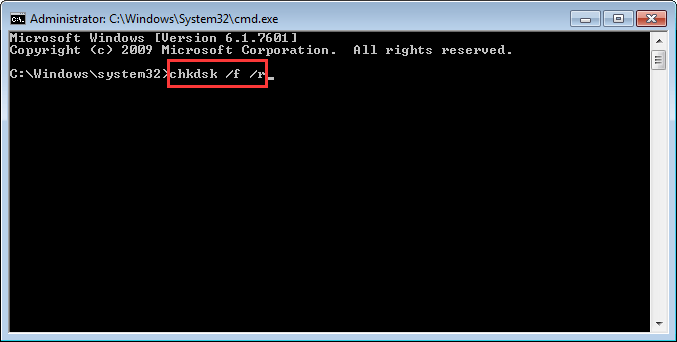
1. OpenCommand Prompt as an administrator.
2. Typechkdsk /f /r and hitEnter . You need to wait a while until the process completes.
Run a system file check
Follow steps below:
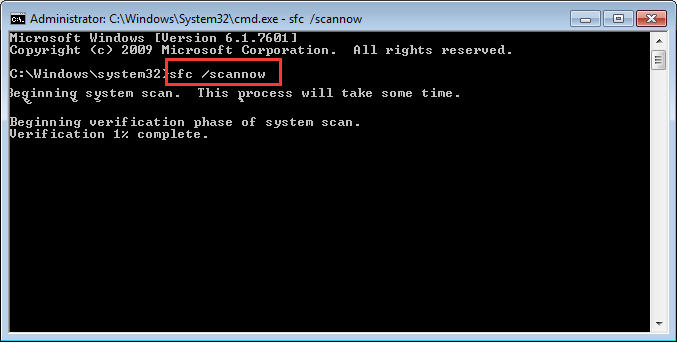
1. OpenCommand Prompt as an administrator.
2. Type or pastesfc /scannow and hitEnter . The process will also take some time to complete.
Hope the solutions here will help you fix the Windows 10 Automatic Repair loop error.
Also read:
- [New] Elevating Engagement Professional Tips for YouTube Video Tweaks
- 7 Solutions to Fix Error Code 963 on Google Play Of Lava Blaze Pro 5G | Dr.fone
- Fix & Guide: PUBG Building Loading Problems Solved
- Ghostly SnapSnapping Stealthy Techniques for Photo-Taking on Snapchat for 2024
- MagicBook 14 Pro Review: Value-Packed 14 Powerhouse Laptop with Dedicated GPU - Insights From a Live Test Drive | TechDigest
- Motorola One 5G Ace: Unmatched Blend of Ultra-Fast Internet and Long-Lasting Power for the Modern User
- Resolving the 'Cannot Reset PC' Issue in Windows 11 – A Complete Guide
- Solving Game Playability: Resolving Windows Driver Issues for a Smooth Minecraft Experience
- Step-by-Step Tutorial for Restoring Broken Dell USB Port Functionality
- The Ultimate Guide to Instagram Looping Videos
- Top 12 Free Movie Streaming Sites of the Year
- Troubleshoot and Solve Unwanted Screen Shaking in Windows 11 – Expert Tips & Tricks
- Troubleshooting Audio Issues: Unplugging Headphones or Speakers in Windows
- Troubleshooting: Fixing the Right-Click Function on a Mouse in Windows 11
- Windows' Sleepy Secret - PC Does Not Awake
- Your Complete Guide To Reset Xiaomi Redmi Note 12 Pro 5G | Dr.fone
- Title: Step-by-Step Guide to Troubleshooting Failed Feature Updates on Windows 10 Version 1607
- Author: Anthony
- Created at : 2025-02-14 23:20:37
- Updated at : 2025-02-17 00:39:18
- Link: https://win-howtos.techidaily.com/step-by-step-guide-to-troubleshooting-failed-feature-updates-on-windows-10-version-1607/
- License: This work is licensed under CC BY-NC-SA 4.0.