
Resolving the GeForce Shadow Play Installation Error: Step-by-Step Guide
Step-by-Step Walkthrough: Activating USB Tethering in Windows 10 Made Easy
Want to use your phone’s mobile data on your Windows 10 PC? It’s easy. You’ll learn whatever you want to know about USB tethering in this guide.
Click the link below to get to your interested part:
- What is USB tethering?
- Is it free to use USB tethering?
- How do I tether my phone on Windows 10?
- USB tethering not working on Windows 10?
Disclaimer: This post includes affiliate links
If you click on a link and make a purchase, I may receive a commission at no extra cost to you.
What is USB tethering?
You can share your phone’s mobile data with another device, like your laptop, through tethering . It makes your laptop be able to connect to the Internet when there’s no network connection. There are three types of tethering:USB tethering ,Wi-Fi tethering ,Bluetooth tethering .
USB tethering has the fastest speed among the three ones. It requires a USB cable to connect your laptop with your phone. But at the same time, it makes your phone suck power from your laptop’s USB port instead of draining.
Is it free to use USB tethering?
Whether it will cost your money or not, it depends on your carrier. In the US, most carriers do charge. You canconsult your carrier’s website for further information.
If you use a third-party tethering app, it’s possible to be free to use USB tethering. But even that, sometimes your carrier can still detect your tethering. Then you might have to pay.
How do I tether my phone on Windows 10?
It’s very easy to tether your phone on Windows 10, do these:
Connect your phone with your Windows 10 through a compatible USB cable.
Tap Settings
 on your phone.
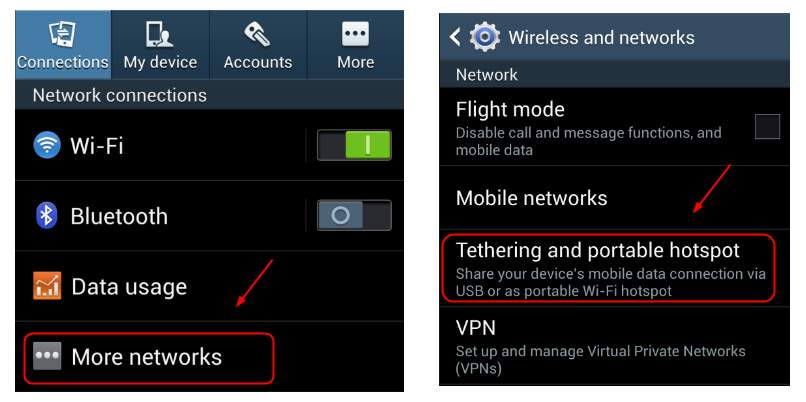
Tap More networks > Tethering and portable hotspot .
 on your phone.
Note: You may also find the tethering option under the Mobile Data or Personal Hotspot sections based on different phones.
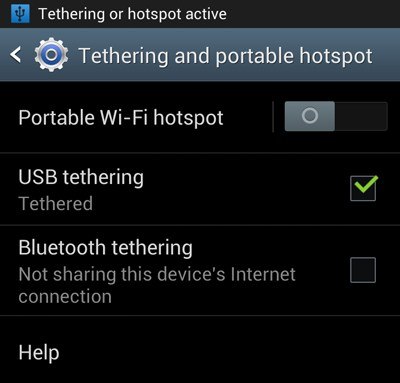
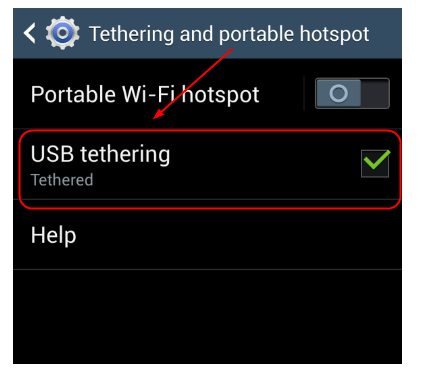
- Tap to check USB tethering .
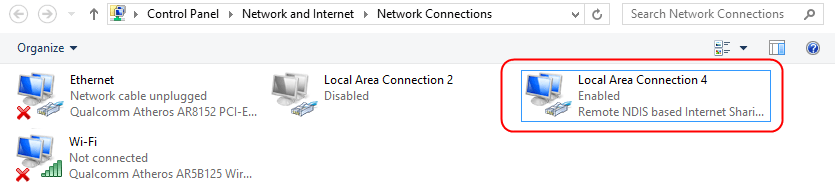
- If your Windows 10 is in a no wired and no wireless network place, it should then be used this network adapter automatically: Remote NDIS based Internet Sharing Device . It’s your USB tethering connection in the Windows 10.
If you seeEnabled on it, the tethering is successful. You’re able to access the Internet on your Windows 10.
How do I fix USB tethering not working on Windows 10?
When the USB tethering stops working on your Windows 10, probably the USB tethering driver on your computer is corrupted, old or missing. Replacing the driver with the built-in one on your Windows 10 manually, or updating your USB tethering driver via Driver Easy automatically, these two methods can always help you solve the problem.
If you are not confident playing around with the drivers manually, or you don’t have the time or patience, we highly recommend you to use Driver Easy to help you solve the driver problem automatically.
- Update your USB tethering driver via Driver Easy automatically [RECOMMENDED]
- Replace the driver with the built-in one on your Windows 10 manually
Method 1: Update your USB tethering driver via Driver Easy automatically
Driver Easy is a very helpful and credible driver tool. It will automatically recognize Windows 10 or any other version of Windows system and find the correct drivers for it. You don’t need to know exactly what system your computer is running, you don’t need to risk downloading and installing the wrong driver, and you don’t need to worry about making a mistake when installing.
You can update your drivers automatically with either theFREE or thePro version of Driver Easy. But with the Pro version it takes just 2 clicks (and you get full support and a 30-day money back guarantee):
Download and install Driver Easy.
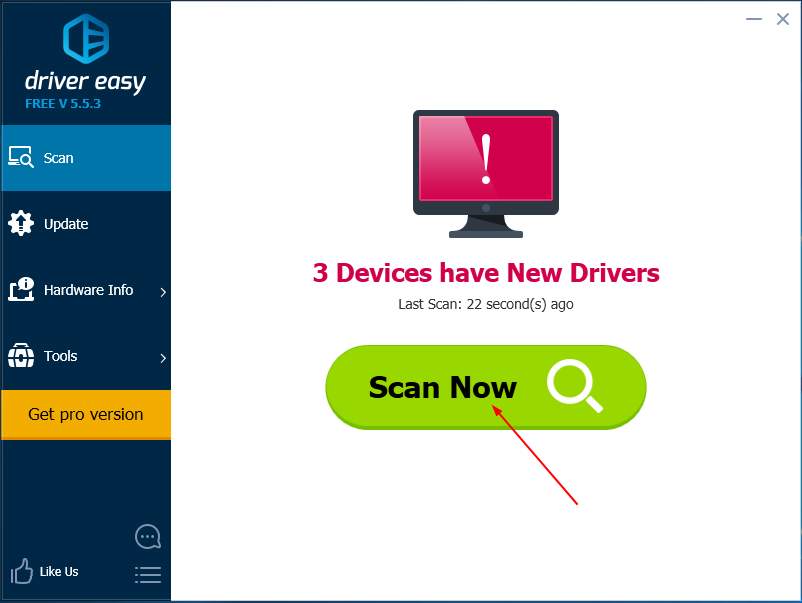
Run Driver Easy and click Scan Now button. Driver Easy will then scan your computer and detect any problem drivers.
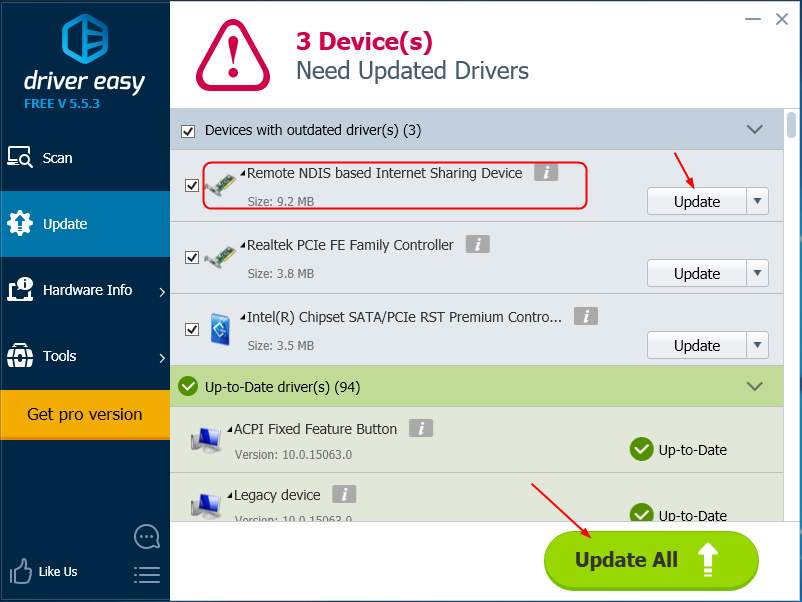
- Click the Update button next to a flagged driver to automatically download and install the correct version of this driver (you can do this with theFREE version).
Or click Update All to automatically download and install the correct version of all the drivers that are missing or out of date on your system (this requires the Pro version – you’ll be prompted to upgrade when you click Update All).
- Restart your laptop. Then check to see if you can access the Internet on your Windows 10 via USB tethering.
Method 2: Replace the driver with the built-in one on your Windows 10 manually
On your keyboard, pressWindows logo key
and X at the same time to invoke the quick access menu.ClickDevice Manager .
 and X at the same time to invoke the quick access menu.
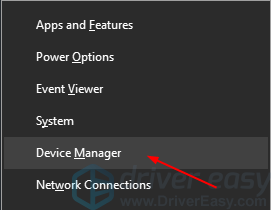
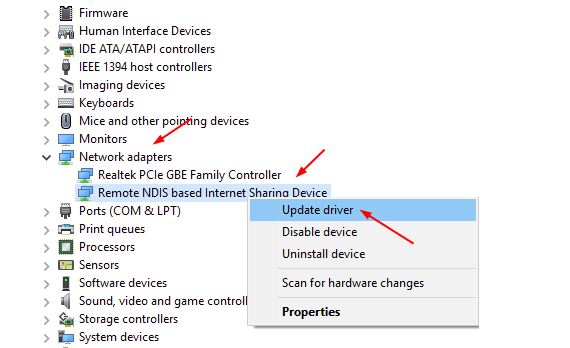
- Expand Network adapters and right-click Remote NDIS based Internet Sharing Device . Then click Update driver .
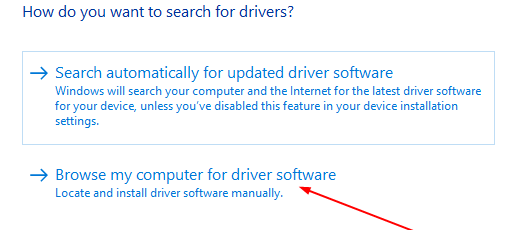
- ClickBrowse my computer for driver software .
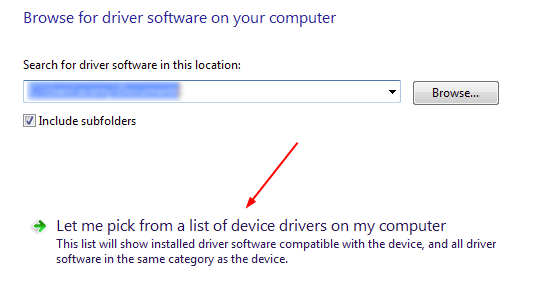
- Click Let me pick from a list of device drivers on my computer .
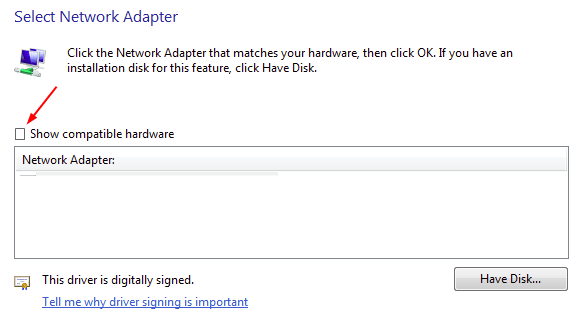
- Click the small box beside the Show compatible hardware . Note: It’s ticked on by default. When you click it, it will get blank.
- Wait for a few seconds, you should then see the screen shown below. Select Microsoft > USB RNDIS6 Adapter . Then click Next .

- Click Yes .

Wait for a while, Microsoft will install the driver for you. Then you should see this screen

Check to see if you can access the Internet on your Windows 10 via USB tethering.
Also read:
- [FIXED] PUBG Not Launching 2024 Guide
- [New] Affordable Acoustic Amps and Mics for Video Voyagers for 2024
- [New] Tips for Quickly Locating the Epicenter of YouTube's Video Creation for 2024
- [New] Unearthing the Skies Hubsan H501X4 Quad Drone Analysis
- 2024 Approved Decoding the Art of Engaging in YouTube Short Forms
- AMD Vs. Apple: The Laptop CPU Race Heats Up as Newest Chip Surpasses M3 Max in Core Performance
- Anticipating Apple's AI Household Companion: Insights on Pricing, Launch Timeline & Features
- Bypassing Startup Problems: Effective Fixes for Windows 10 Frozen Screen Scenarios
- Complete Setup Blueprint for WM6
- Decoding and Remedying Error Message: 'Windows Update Error Code 0X8024401c' On Win DOS-Based Desktops.
- Error Resolution: Incompatible Data Entry Showing Up on Screen
- Fixing Connection Issues with a Malfunctioning Dell Keyboard
- From Standard to Superior: Upgrading From Home to Pro Win11
- How To Recover iPhone 6 Plus Data From iTunes? | Dr.fone
- In 2024, How to use Pokemon Go Joystick on Infinix Smart 8 HD? | Dr.fone
- Mastering Windows 10 Sound Issues: A Comprehensive Guide to Reviving Your Volume Controls
- Overcoming Mouse Interruption Woes: Strategies for Reliable Connection Solutions
- Personalization Controls Restored - Previous Glitch Cleared Up
- Solving the 'No Audio Output Device' Problem on Windows 11: A Step-by-Step Guide
- Title: Resolving the GeForce Shadow Play Installation Error: Step-by-Step Guide
- Author: Anthony
- Created at : 2025-02-16 00:23:01
- Updated at : 2025-02-16 22:07:26
- Link: https://win-howtos.techidaily.com/resolving-the-geforce-shadow-play-installation-error-step-by-step-guide/
- License: This work is licensed under CC BY-NC-SA 4.0.