Overcoming HDCP Limitations on Your Display Unit - A Guide to Enhanced Performance
Harmonizing Display and Timing - Monitor Support Now Restored
Parental Control Software
Does your monitor screen go black and pop up with an error saying: The current input timing is not supported by the monitor display ?
This error occurs to your computer because your monitor fails to synchronize the input signals from your computer, or there is something wrong with your monitor connections. But don’t worry. We’ll help you fix the error and get your monitor back on track.
 DLNow Video Downloader
Try these fixes
Here are the solutions that have helped people resolve the same problem. Check it out:
Note: If you can’t log into your system GUI, you should first boot your computer into Safe Mode , then perform these instructions.

WPS Office Premium ( File Recovery, Photo Scanning, Convert PDF)–Yearly
Fix 1: Change your monitor settings
As suggested in the error message, you can change your input timing to the specific resolution and refresh rate (in my case it’s1920×1080@60Hz ) or any other monitor listed timing as per monitor specifications. So you should change these monitor settings to match.
If you’re using Windows 10 and Windows 8:
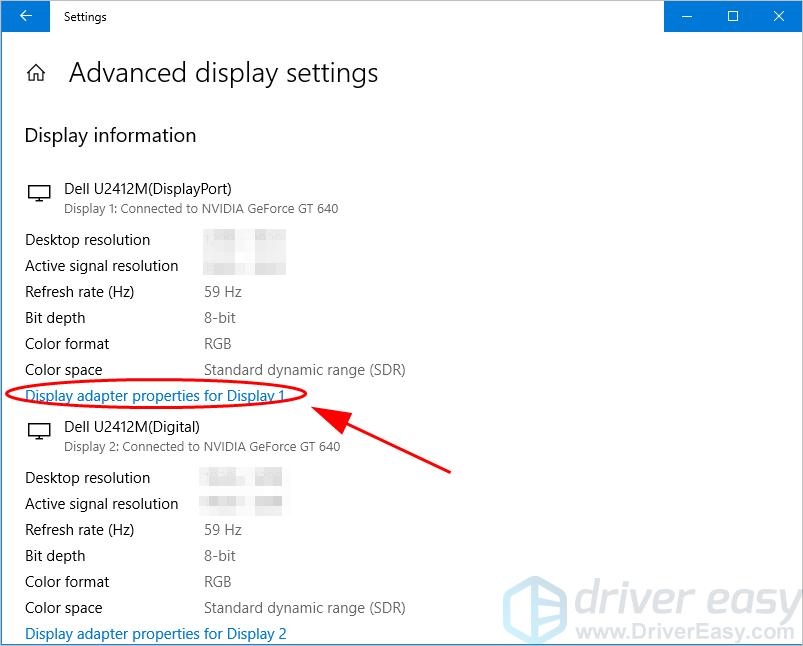
Note : if you have more than one displays, choose the displays respectively for the following steps.
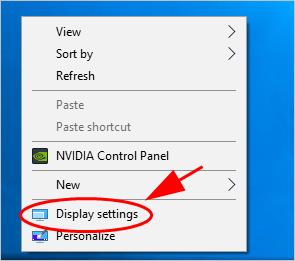
- Right click on anyempty area on your desktop, then selectDisplay Settings .

- In theDisplay section, scroll down and findResolution , and change it to the specific resolution (in my case I choose1080×1920 ).
ZoneAlarm Extreme Security NextGen
- ClickKeep changes if you see the popup verification dialog.
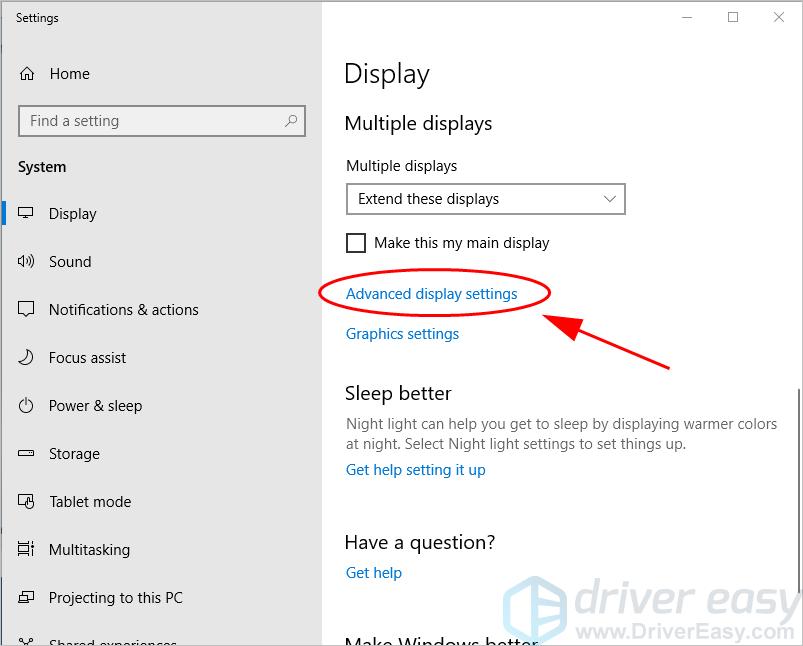
- Then clickAdvanced display settings on the same screen.
- ClickDisplay adapter properties for Display .
Take advantage of PREMIUM features for 12 months.
Create your texts / logos without any limitation.
No attribution required when downloading.
No advertising on the website.
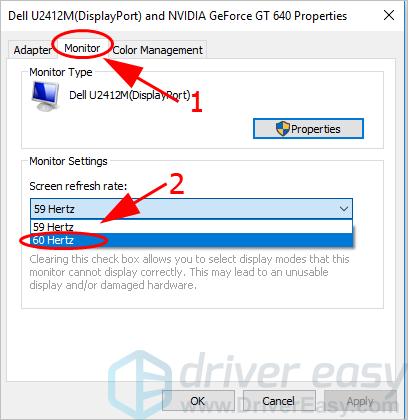
TextStudio.com PREMIUM - Yearly Membership - Click theMonitor tab in the popup pane, and changeScreen refresh rate to the one shown in your error message (in my case it’s60Hz ).
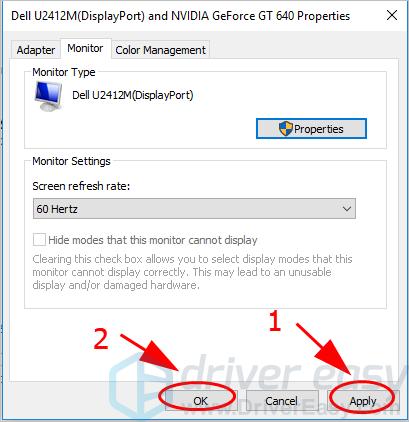
- ClickApply andOK to save the changes.
 ZoneAlarm Extreme Security NextGen
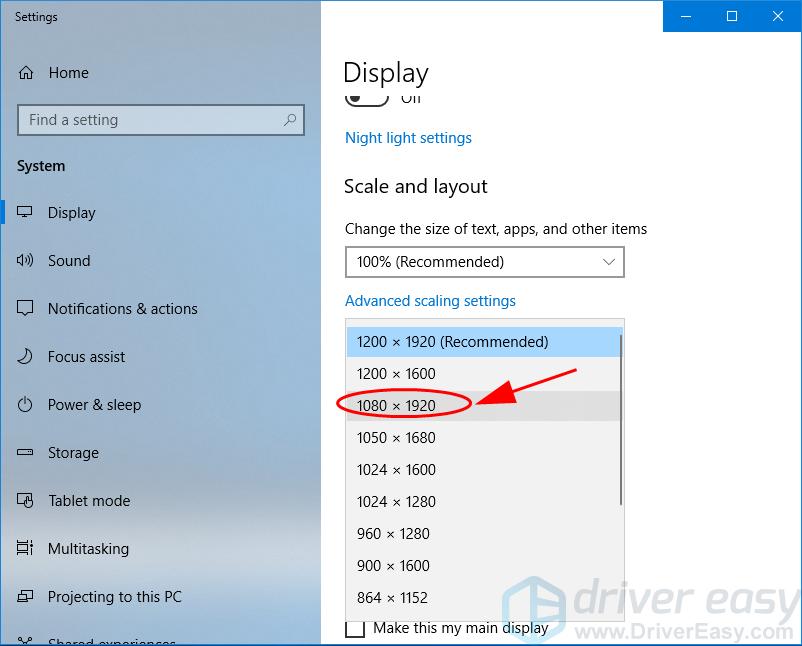


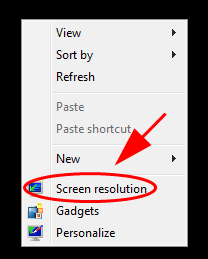
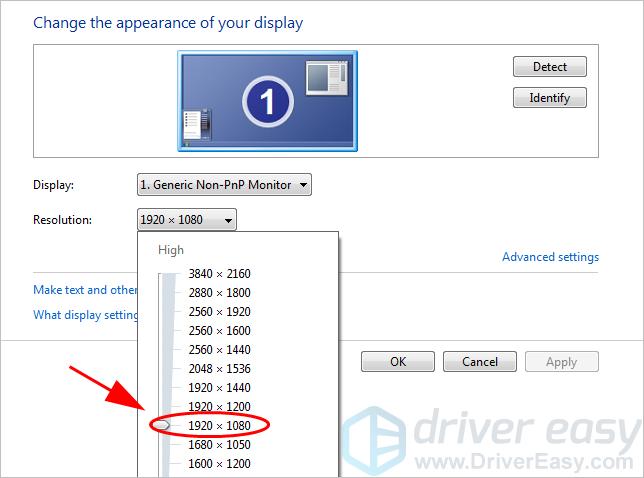
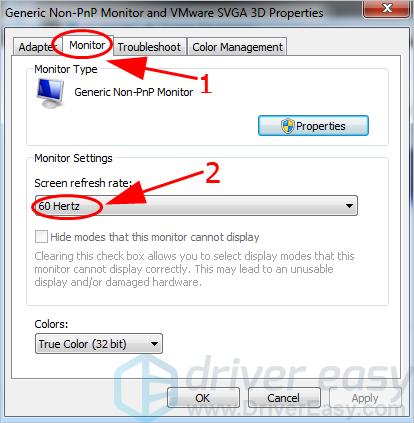
If you’re using Windows 7:
Note : if you have more than one displays, choose the displays respectively for the following steps.
- Right click on anyempty area on your desktop, then selectScreen resolution .
- ChangeResolution to the specific resolution (in my case I choose1080×1920 ).
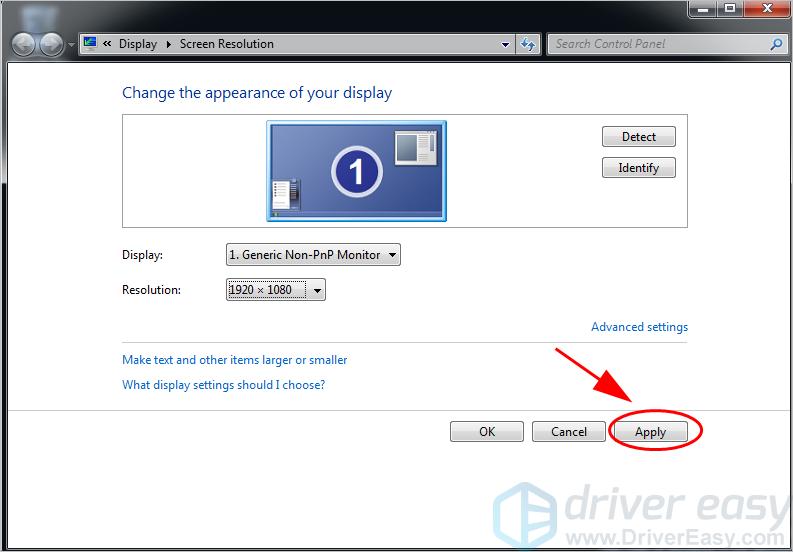
- ClickApply .
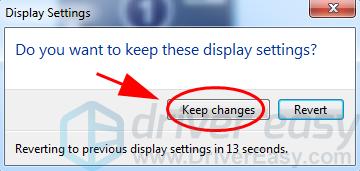
- ClickKeep changes if you see the verification message.
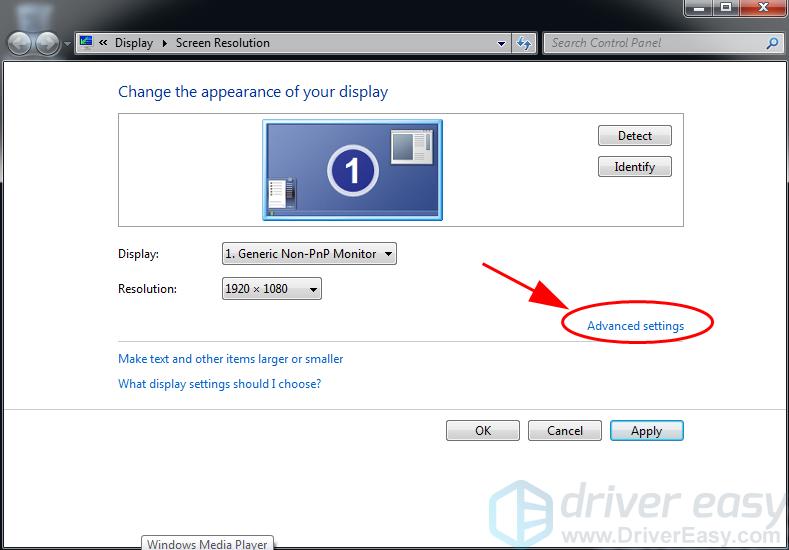
- On the same screen, clickAdvanced settings .
- Click theMonitor tab, and choose the specific refresh rate shown in your error message (in my case I choose60Hz ).
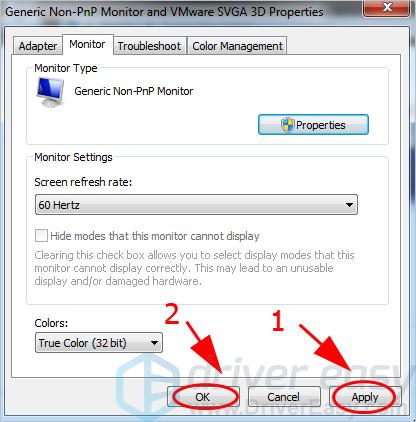
- ClickApply andOK to save the changes.

Restart your computer in normal mode and see if it works.
Fix 2: Update graphics card driver
The video card driver corruption can also cause your input timing not supported error, so you should keep your video card driver up to date.
There are two ways to update your graphics card driver:manually andautomatically .
Manually update driver : You can go to the manufacturer’s website, find the latest correct driver for your graphics card, then install it in your computer. Be sure to install the one that is compatible with the OS running in your computer.
Automatically update driver : If you don’t have time or patience, you can do it automatically with Driver Easy .
Driver Easy will automatically recognize your system and find the correct drivers for it. You don’t need to know exactly what system your computer is running, you don’t need to risk downloading and installing the wrong driver, and you don’t need to worry about making a mistake when installing.
You can update your drivers automatically with either the FREE or the Pro version of Driver Easy. But with the Pro version it takes just 2 clicks (and you get full support and a 30-day money back guarantee):
- Download and install Driver Easy.
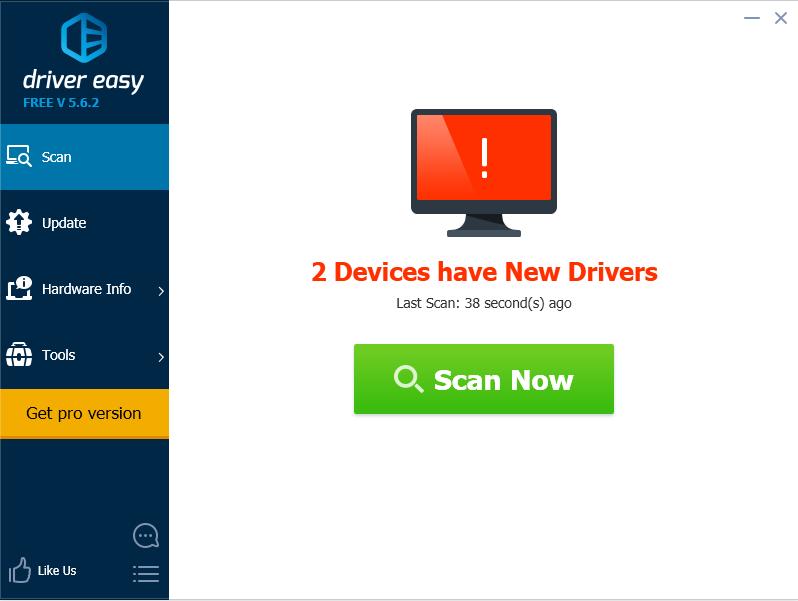
- Run Driver Easy and clickScan Now . Driver Easy will then scan your computer and detect any problem drivers.
Glarysoft File Recovery Pro Annually - Helps to recover your lost file/data, even permanently deleted data.
- Click theUpdate button next to the flagged graphics card to automatically download the correct version of their driver (you can do this with theFREE version), then install it in your computer.
Or clickUpdate All to automatically download and install the correct version of all the drivers that are missing or out of date on your system (this requires the Pro version – you’ll be prompted to upgrade when you clickUpdate All ). - Restart your computer to take effect.
 Glarysoft File Recovery Pro Annually - Helps to recover your lost file/data, even permanently deleted data.
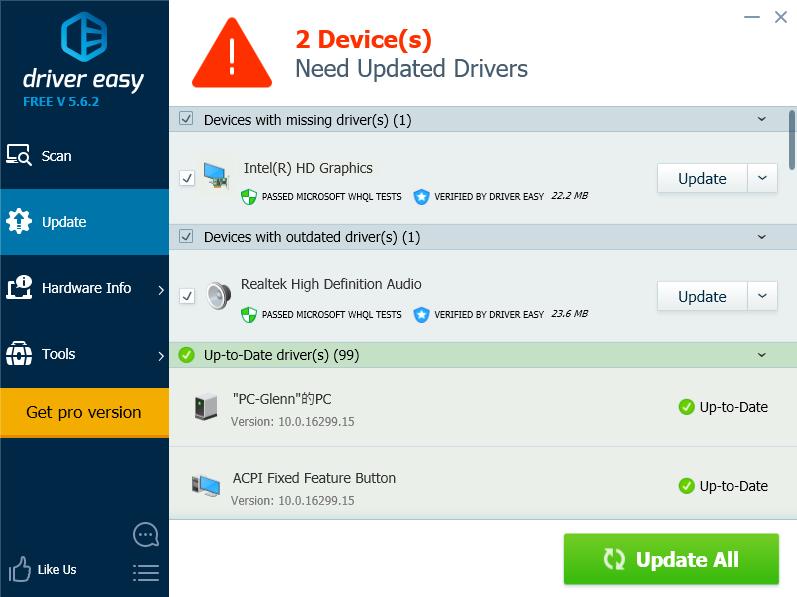
This should fix your problem. Still no luck? Okay, there’s one more thing to try.
Fix 3: Boot your computer in low-resolution mode
This method has been said to be working for many people who have the same error. You can try using the low resolution mode in your computer, in order to match the resolution for your monitor.
If you’re using Windows 10, Windows 8 and Windows 8.1:
- Ensure your PC isoff .
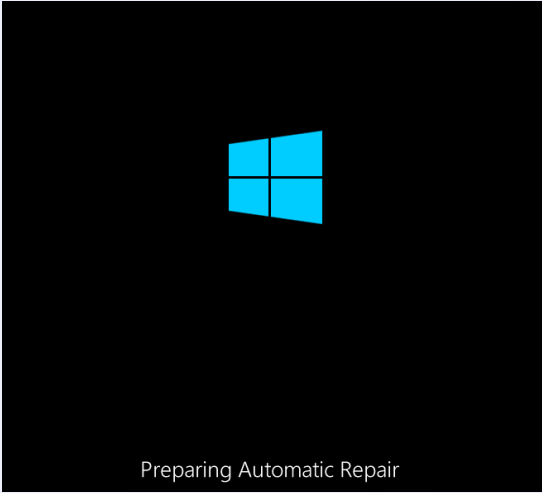
- Press the power button to turn on your PC, then hold the power button down until PC shuts down automatically (about 5 seconds) . Repeat this more than 2 times until you see thePreparing Automatic Repair (see below screenshot).
Note: This step is aim to bring upPreparing Automatic Repair screen. When Windows doesn’t boot properly, this screen pops up and Windows attempts to fix the problem by itself. If you’ve seen this screen at the first time when you power up the computer, skip this step.
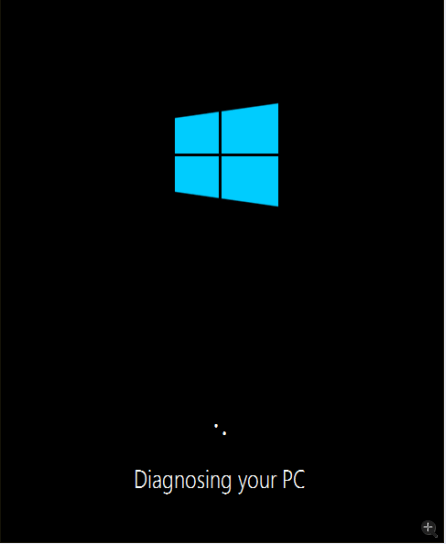
Then wait for Windows to diagnose your PC.
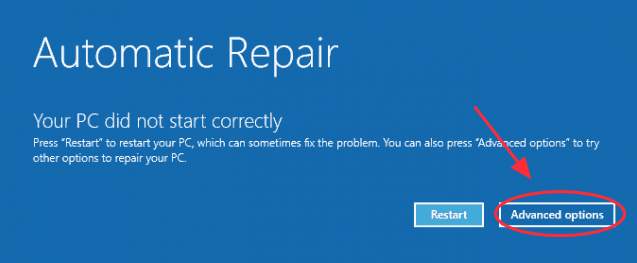
WPS Office Premium ( File Recovery, Photo Scanning, Convert PDF)–Yearly - ClickAdvanced options, then the system will bring up the Windows RE (Recovery environment.) screen.
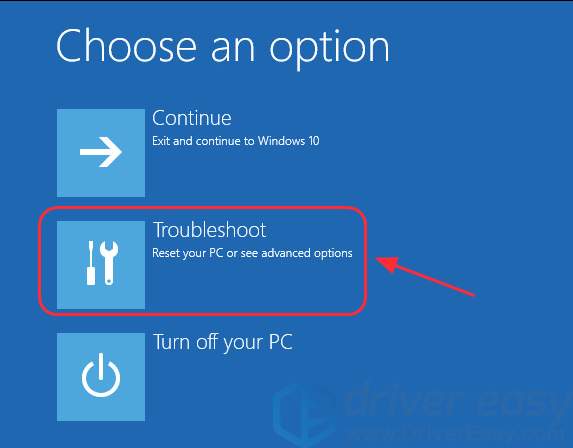
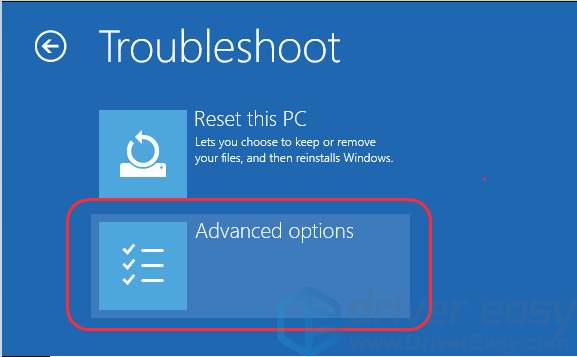
- ClickTroubleshoot .
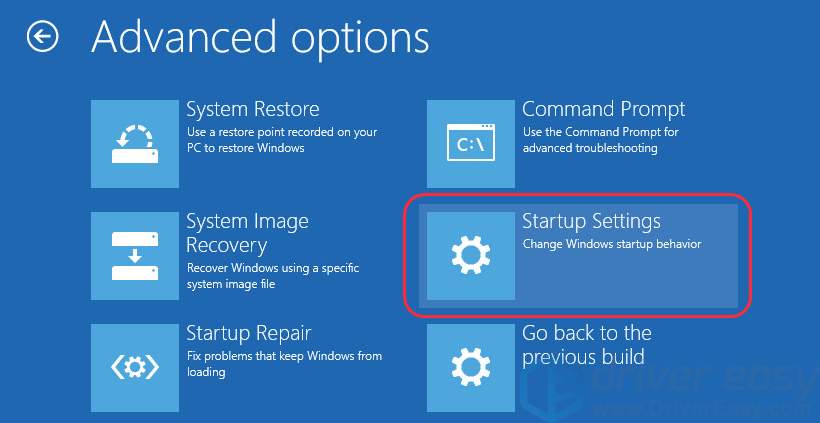
- ClickAdvanced options .
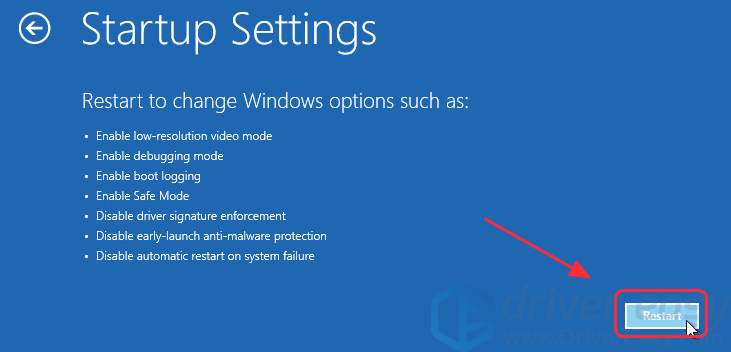
- ClickStartup Settings to continue.
- ClickRestart . The computer restarts and another screen opens showing a list of different startup options.
- Press thenumber key (normally thenumber 3 key ) next to the option:Enable low-resolution video (mode ).

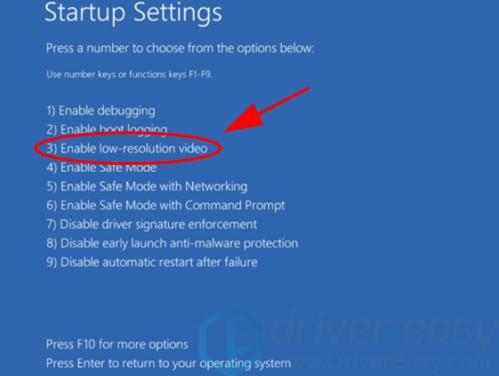
Then your computer will boot into the low-resolution mode and it should fix your error.
If you’re using Windows 7, Windows XP or Windows Vista:
You can try the traditionF8 key to get into the boot options:
- Power on your computer, then keep pressingF8 key after your monitor displays its own logo or post screen and before you see the Windows logo.
- In theAdvanced Boot Options Menu screen, press thearrow up orarrow down key to selectEnable VGA Mode (orEnable low-resolution mode ).
- Then pressEnter on your keyboard.

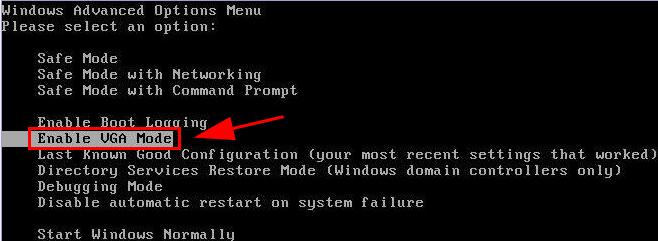
Your computer will boot into the selected VGA mode and your error message should disappears.
That’s it. Hope this post comes in handy and fixes the error “ The current input timing is not supported by the monitor display ” in your computer.
- Title: Overcoming HDCP Limitations on Your Display Unit - A Guide to Enhanced Performance
- Author: Anthony
- Created at : 2024-08-19 07:20:14
- Updated at : 2024-08-20 07:20:14
- Link: https://win-howtos.techidaily.com/overcoming-hdcp-limitations-on-your-display-unit-a-guide-to-enhanced-performance/
- License: This work is licensed under CC BY-NC-SA 4.0.