
Mastering Excel: A Step-by-Step Guide on Setting Your Number's Accuracy
Mastering Excel: A Step-by-Step Guide on Setting Your Number’s Accuracy
Quick Links
Setting the rounding precision forces Excel to always round numeric values to a specified number of digits following the decimal, saving you from having to use the ROUND function on each formula. Here’s how it works.
Note that setting Excel’s rounding precision can save time, but be certain you want to round all values before you enable this feature. When Excel is set to round numbers, it deletes the extra data following the precision point you set, permanently affecting the accuracy of the numbers in your workbook. This means, for example, that if a value like “12.7851698” is displayed with two digits after the decimal point, then Excel will permanently delete the “51698” and leave only the “12.76” remaining.
This feature also works on a per-workbook basis, meaning you can enable it for some workbooks and not others. You must enable it for an entire workbook, though; you can’t enable it only for specific sheets within a workbook.
Where to Find the “Set Precision As Displayed” Option
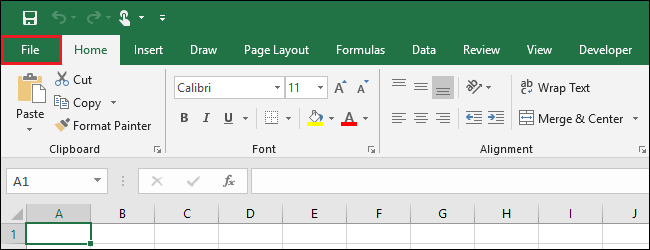
Navigate to the “File” menu.
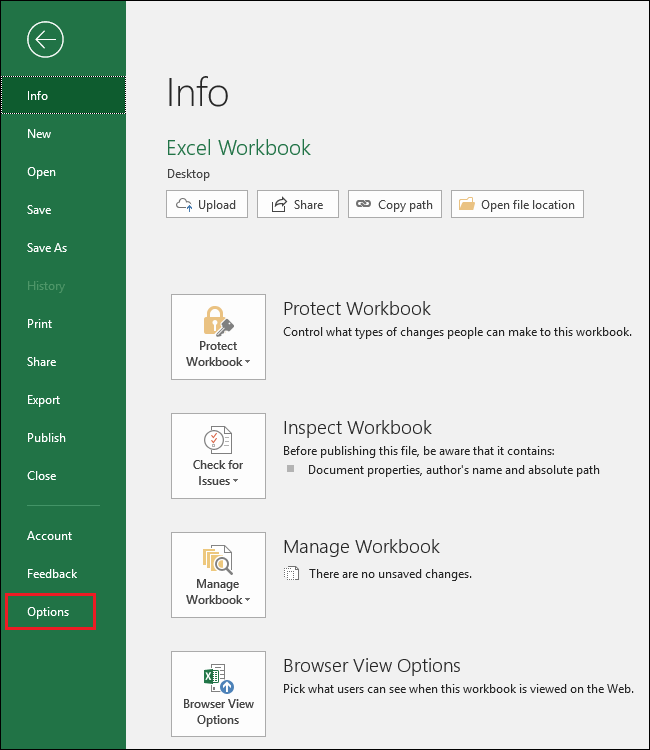
Select the “Options” menu.
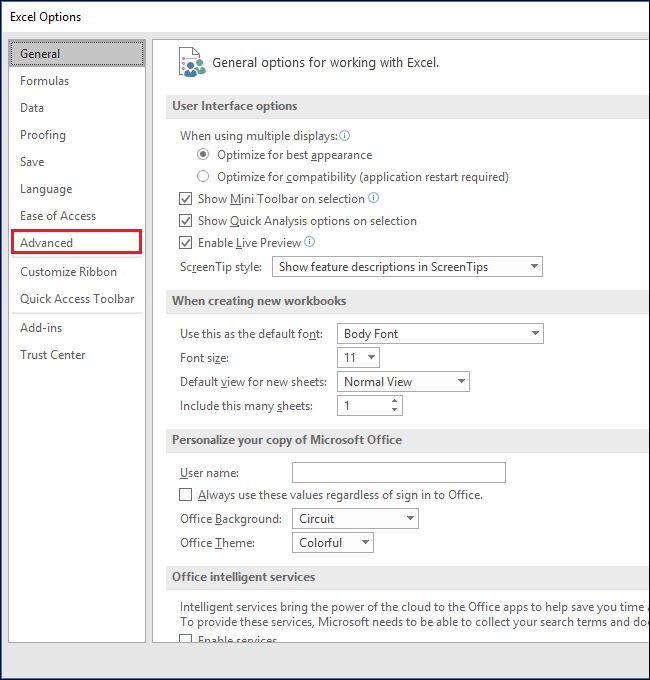
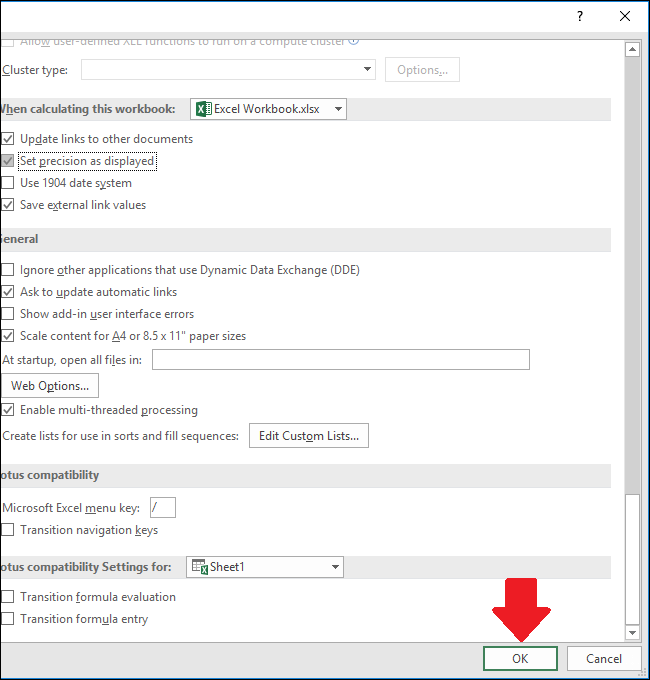
In the Excel Options window that appears, click the “Advanced” category on the left.
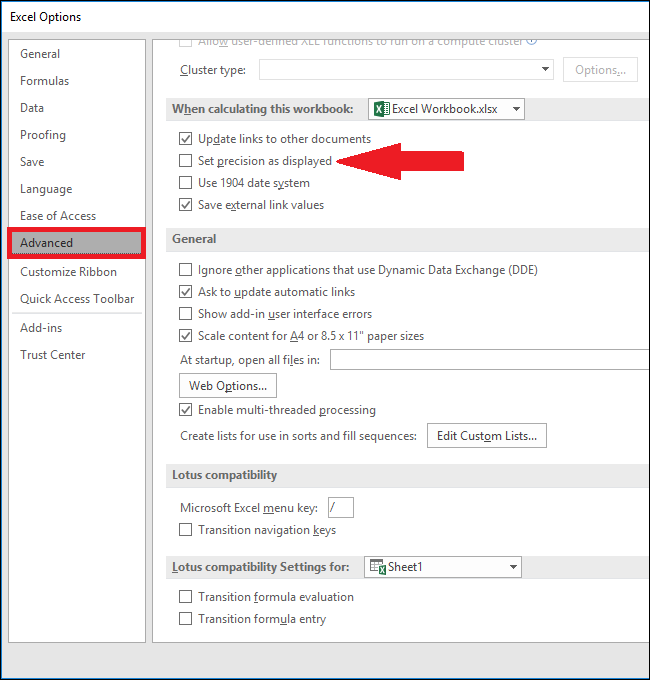
On the right, scroll all the way to the bottom. You’ll find the “Set Precision As Displayed” option in the “When Calculating This Workbook” section. You can select different currently-opened workbooks using the drop-down.
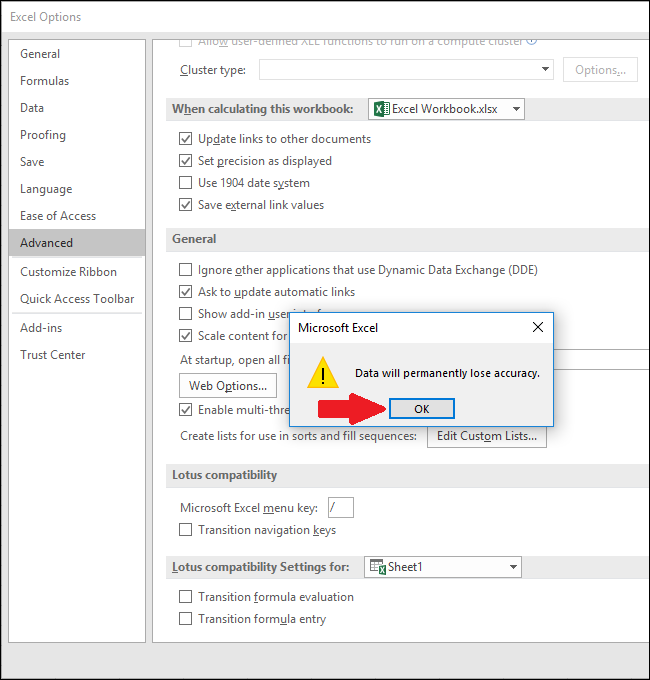
When you select the check box, Excel displays a warning letting you know that the data in the workbook will permanently lose accuracy. Click the “OK” button.
Now click the “OK” button to exit the Excel Options window and return to the “File” menu.
You can set how many digits are kept by altering how numbers are displayed in the “Home” menu’s “Number” group.
Also read:
- 2024 Approved Android Capture King Spam-Free Edition
- 2024 Approved Tutorial Triumphant Skyrocketing Your YouTube Presence
- Best Screen Grabber Gadgets for YouTube Channels
- Cutting-Edge Typography in AE Top 10 Sets of Texts
- Dealing with Touchless Screens? Learn Quick Fixes for Activating Interactive Controls
- Fixing the Issue: How to Get Your Corsair HS35 Microphone Functional on Windows
- How to Overcome Unexpected Shutdown (Error 1067) on Your Windows PC - Now Solved!
- Premium Aural Accessories for Screen Entertainment
- Simple Guide on Distributing Your Samsung Image Collection to Others
- Troubleshooting and Resolving 'Error Code 39' In Optical Drives – Easy Fixes for a Smooth Run
- Troubleshooting Guide: Resolving 'Failed to Enumerate Objects' On Windows 11
- Title: Mastering Excel: A Step-by-Step Guide on Setting Your Number's Accuracy
- Author: Anthony
- Created at : 2025-01-18 16:56:31
- Updated at : 2025-01-25 16:54:36
- Link: https://win-howtos.techidaily.com/mastering-excel-a-step-by-step-guide-on-setting-your-numbers-accuracy/
- License: This work is licensed under CC BY-NC-SA 4.0.