
Master the Fix for Windows 11 Update Error: Understanding and Solving 0X80240034
Error Code 0X80073CF9 in Windows 11 Explained - Understand and Solve the Issue Today
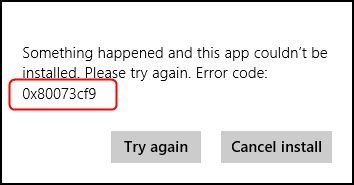
If you’re on Windows 10,8.1 or 8, and you try to install the apps from Store, you may get this error saying Something happened and this app couldn’t be installed. Please try again. Error code: 0x80073cf9
You’re not alone. Many Windows users are reporting it. But the good news is you can fix it. Go on with the easy solution below.
Note: The screens shown below are from Windows 10, but all the fixes also apply to Windows 8 too.
Please click the solution according to your Windows operating system.
For Windows 8 users:Restore AUInstallAgent directory in the Windows Folder
For Windows 10/8.1 users:Restore AppReadiness directory in the Windows Folder
Disclaimer: This post includes affiliate links
If you click on a link and make a purchase, I may receive a commission at no extra cost to you.
For Windows 8 users: Restore AUInstallAgent directory in the Windows Folder
0x80073cf9 could be probably caused by the missing AUInstallAgent directory in your Windows 8.
To restore it:
On your keyboard, press the Windows logo key
 and E at the same time to invoke the File Explorer window.
Go to This PC > Local Disk (C:) > Windows .
 and E at the same time to invoke the File Explorer window.
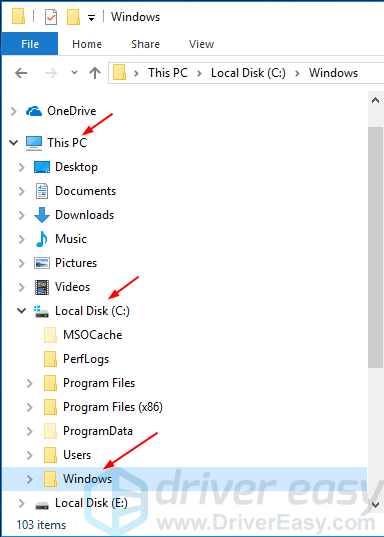
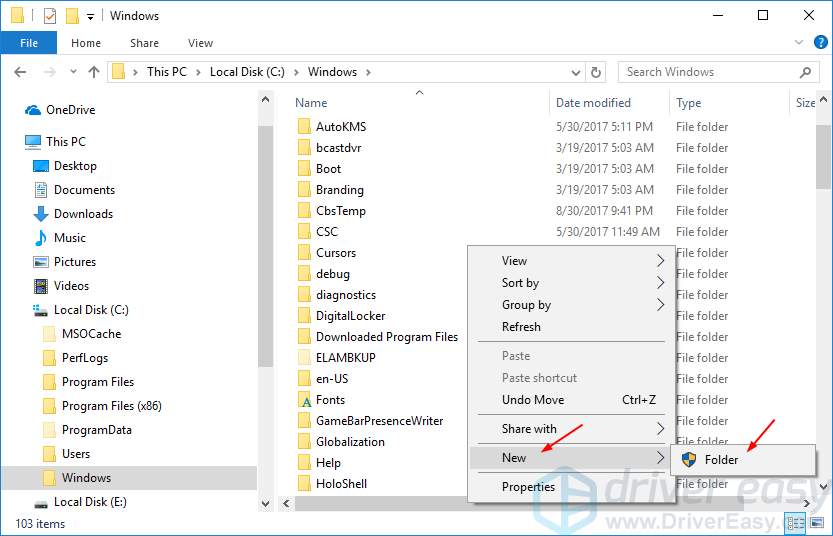
- Right-click on the blank area to click New , then Folder .
ClickYes when prompted by User Account Control.
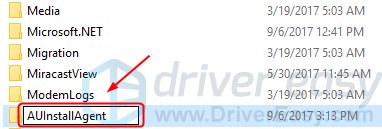
Name the new folder: AUInstallAgent .
- Reboot your Windows 8. Then go to the Windows App Store to install the app again to see if it’s successful.
For Windows 10/8.1 users: Restore AppReadiness directory in the Windows Folder
0x80073cf9 could be probably caused by the missing AppReadiness directory in your Windows 10 or 8.1.
To restore it:
On your keyboard, press the Windows logo key
and E at the same time to invoke the File Explorer window.Go to This PC > Local Disk (C:) > Windows .
3) Right-click on the blank area to click New, then Folder .
ClickYes when prompted by User Account Control.
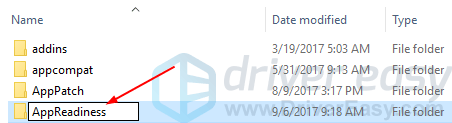
Name the new folder: AppReadiness .
- Reboot your Windows 10/8.1. Then go to the Windows App Store to install the app again to see if it’s successful.
Also read:
- [New] The Ultimate Metaverse Advertising Playbook for 2024
- [New] Visual Tweets The Panorama of Threaded Video for 2024
- [Updated] 2024 Approved Core Concepts in Web Stories Crafting
- [Updated] In 2024, Instant Reachers' Handbook Livestreaming on Facebook via Smartphones
- 「動画から独立した音声抽出方法:パソコン使用ガイド」
- 「乃木坂46」楽曲フルver.無料ダウンロード方法
- 2024 Approved No-Cost Audio Archives for Professional YouTube Makers
- 4最も効果的な2024年のWindows11画面録画手段
- 連続して3枚のビデオを効果的に一画面表示するテクニック
- 如何将DVD转换为内置字幕或添加字幕功能
- In 2024, How To Use Allshare Cast To Turn On Screen Mirroring On Realme C55 | Dr.fone
- Minecraft Quitting Unexpectedly? Conquer that Exit Code 0 Dilemma Here!
- NHKオンデマンドコンテンツを効果的に保存するための手引き
- Solving the Mystery of the '401 Unauthorized' Webpage Issue
- WAV形式へのMP3ファイル変換手順
- YouTube動画のサムネイルアイコンを取得する究極ガイド
- YouTubeからiPhoneへ: 個人用動画保存とダウンロードの手順
- Title: Master the Fix for Windows 11 Update Error: Understanding and Solving 0X80240034
- Author: Anthony
- Created at : 2025-03-02 18:24:27
- Updated at : 2025-03-05 18:27:51
- Link: https://win-howtos.techidaily.com/master-the-fix-for-windows-11-update-error-understanding-and-solving-0x80240034/
- License: This work is licensed under CC BY-NC-SA 4.0.