
How to Correctly Address and Repair 'Error Code 28' In Windows Device Manager
Expert Advice on Correcting Windows Update Failure with Error Code 0X8024402C - Learn How Here
Error 0x8024402c , occurs when checking for Windows Updates. It could be caused by invalid network settings, update settings and LAN settings. Here in this post, 4 useful fixes to Error 0x8024402c will being shown to you.
Disclaimer: This post includes affiliate links
If you click on a link and make a purchase, I may receive a commission at no extra cost to you.
Fix 1. Enable Automatic Detect Settings
If your computer is not sure how it should connect to the Internet, it would cause Windows Update Error 0x8024402c. In this case, enable Automatic Detect Settings could fix it.
Go with the steps below to enable it.
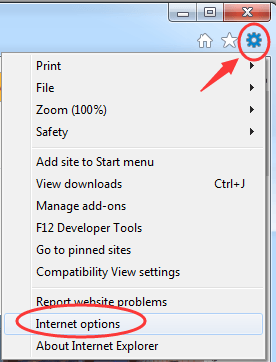
Launch Internet Explorer. Click thesettings icon on the very top right. Then chooseInternet options .
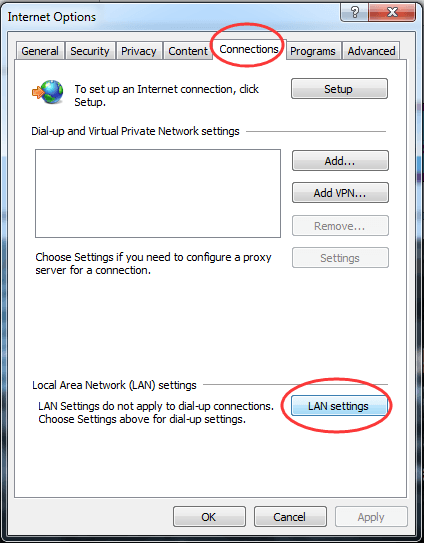
- Click LAN settings underConnection pane.
- Check on Automatically detect settings
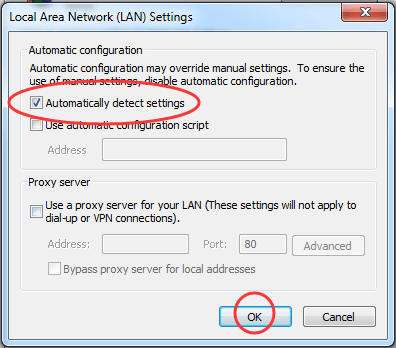
Now try to install Windows Updates now.
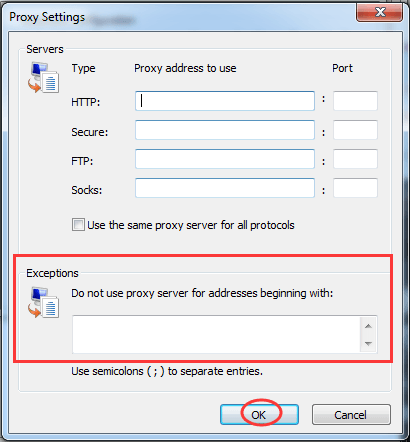
Fix 2. Remove Invalid Characters in Proxy Exception List
Keep your proxy settings clean can prevent your system from navigating to many different and unresourceful servers. Go with the steps below to clean your proxy settings.
~ 3) Follow step 1-3 to open Local Area Network(LAN) settings in Internet Explorer.
ClickAdvanced whileUse a proxy server for you LAN is ticked on.
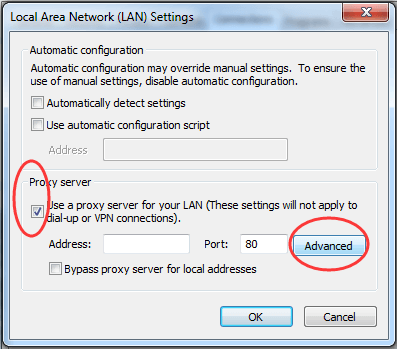
- Clear Exceptions box if there were any content in it.
Then clickOK .
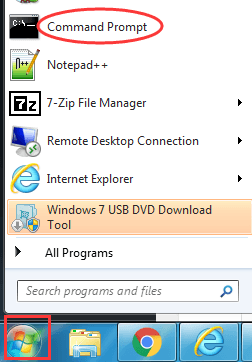
- Exit Internet Explorer and run Command Prompt.
Find and click to open Command Prompt from Start menu.
- Run the commands below one by one.
a) Type netsh winhttp reset proxy and hit Enter .
b) Typenet stop wuauserv and hit Enter .
c) Type net start wuauserv and hit Enter .
Now try to install Windows Updates now.
Fix 3. Change DNS Servers
If there were any issue of your ISP(Internet service provider), it could also lead to Error 0x8024402c. Change DNS Servers into public one can solve it.
- OpenRun dialog box by pressing Windows logo key + R key together.
Then type ncpa.cpl in it and click OK .
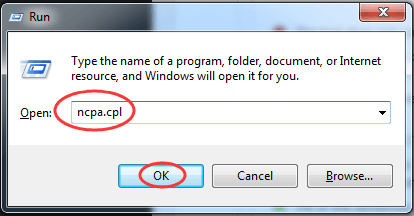
- Now Internet Connection window is open.
Double-click on your active Network Adapter.
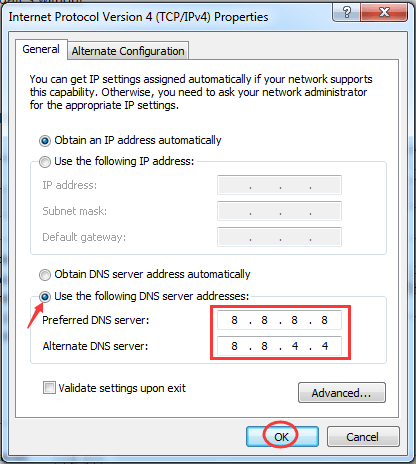
Then click Properties and double-click on Internet Protocol Version 4 (TCP/IPv4) .
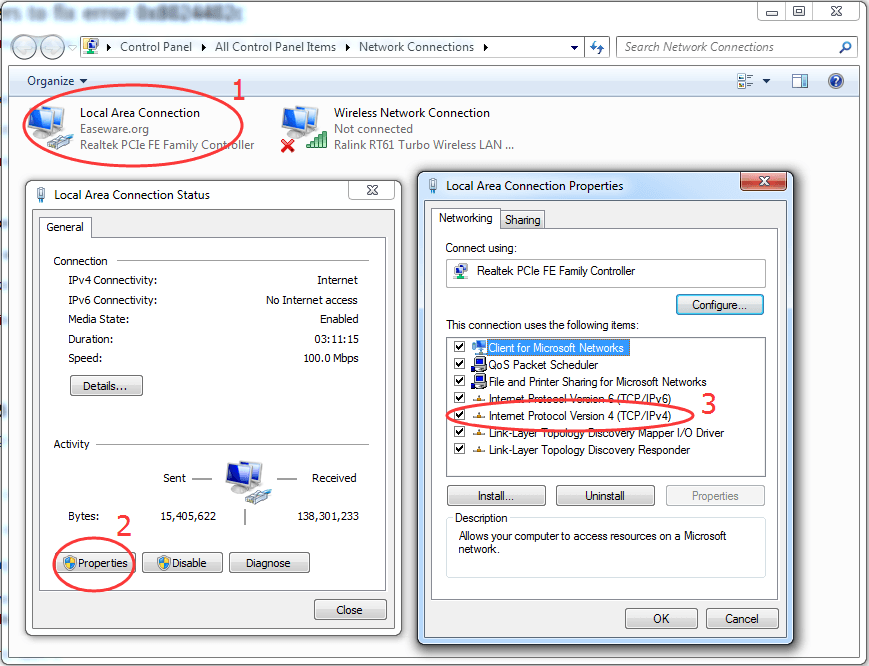
- Locate Use the following DNS server addresses.
SetPreferred DNS server to be8.8.8.8
SetAlternate DNS server to be8.8.4.4
Note: That’s Google’s public DNS server addresses.
Now try to install Windows Updates now.
Fix 4. Configure Updates Client
If the fixes above didn’t serve you, try this one.
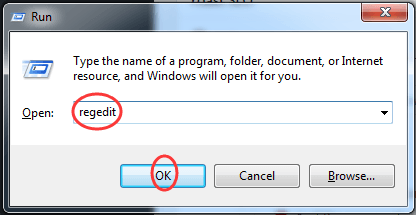
- OpenRun dialog box by pressing Windows logo key + R key together.
Then type regedit in it and click OK .
Click Yes when prompted by User Account Control.
- On Regedit Editor window, head to HKEY_LOCAL_MACHINE > SOFTWARE > Policies >Microsoft > Windows > WindowsUpdate > AU

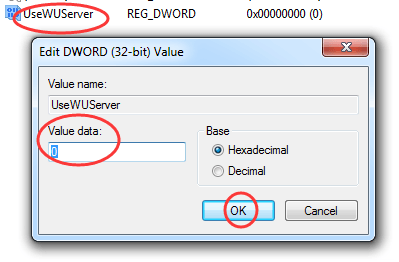
- On the right pane of AU key, double -click on UseWUServer , change its value data into0 .
Then click OK .
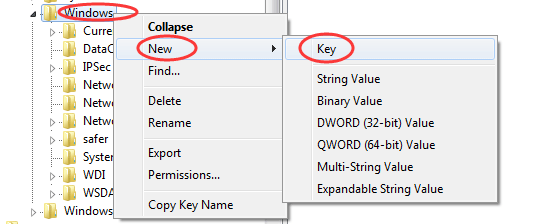
Note: If you can’t find WindowsUpdate, you should create one. Follow the steps below.
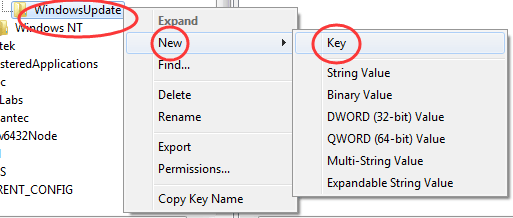
a) Right-click onWindows folder, then choose New > Key .
And name the new keyWindowsUpdate .
b) Right-click onWindowUpdate folder, then choose New > Key .
And name the new keyA U .
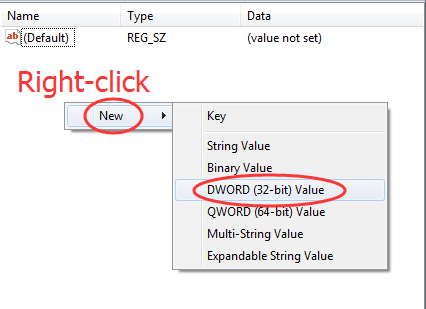
c) Right-click on the right pane of AU key, chooseNew > DWORD (32-bit) Value
Name the new value UseWUServer .
Now try to install Windows Updates now.
After the fixes above, Windows Update should be good to go now.
Also read:
- [New] 2024 Approved Taste the Difference Top 7 Tactics for Cutting-Edge Cookery Films
- [Updated] 2024 Approved Optimal Record Solution Chromebook Edition
- [Updated] Achieve the Perfect Look YouTube's Guide to Video Aspect Ratios for 2024
- [Updated] Easy Guide Turning Your Favorite YouTube Videos Into Animated GIFs for 2024
- 1. Effortless Video Downloads From Crunchyroll: Two No-Cost Techniques
- 新解釈!PCで最新インスタグラムビデオをダウンロードする詳細手引き202#4
- 最新Windows 10でのマイクと内部オーディオ使用による録音プロセスガイド
- Divination for Beginners | Free Book
- Hard Reset Xiaomi Redmi A2 in 3 Efficient Ways | Dr.fone
- RH5770WindowsRTKDrivers
- The Upsurge of Crypto in Online Advertising Spaces
- TikTok 動画直接下載及錄音的最基本方法 - 超簡単!
- Top 10 Des Meilleurs Convertisseurs Vidéos Gratuites Compatibles Avec Windows 10 - Guide 2023
- Windows 10/11版でMy Cinema Appをスムーズに動画録画するチュートリアル
- WMA音楽ファイルをM4A形式に効果的に変換する方法」
- ダウンロード可能なYouTube動画とその字幕:手引き
- フリーかつ簡単な方法 - Windows 1
- Title: How to Correctly Address and Repair 'Error Code 28' In Windows Device Manager
- Author: Anthony
- Created at : 2025-02-26 16:12:42
- Updated at : 2025-03-05 16:16:52
- Link: https://win-howtos.techidaily.com/how-to-correctly-address-and-repair-error-code-28-in-windows-device-manager/
- License: This work is licensed under CC BY-NC-SA 4.0.