
Error 0X80004005 Explained: A Deep Dive Into Correcting Unspecified Problems Successfully
Deciphering and Resolving Error 0X80070091 for Successful System Restores in Windows 11 - Expert Tips

A lot Windows 10 users reported that system restore did not complete successfully. And the problem pop-uped asError 0x80070091shown as image above. It’s a good thing that Microsoft has noticed this error and will update this thread soon. However, if you are Windows 10 Advanced user, you can fix it right now via the methods below. If you’ve faced it, just go with the easy fixes below.
Fix One. Rename the WindowsApps folder in Safe Mode
Boot your Windows 10 into safe mode:
How to:
a)
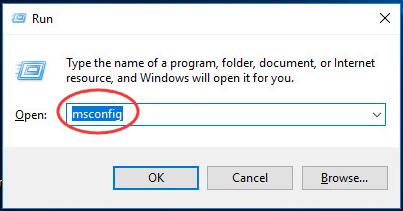
Open run dialog box by pressingWindows key + R key together.
Then type msconfig in the box and hit Enter.
b)
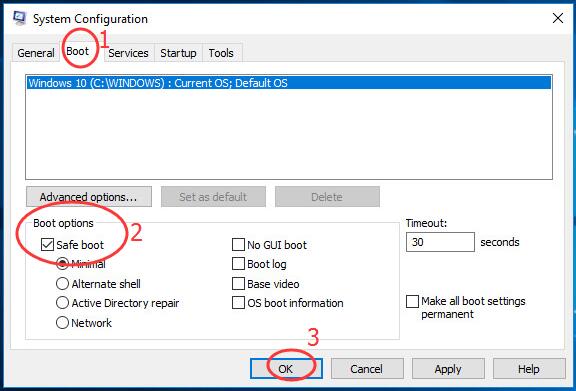
On the pop-up window, view on Boot pane.
Then tick on Safe bootand click OK.
Click Restart, if prompted by system configuration
Then your Windows 10 would get into safe mode.
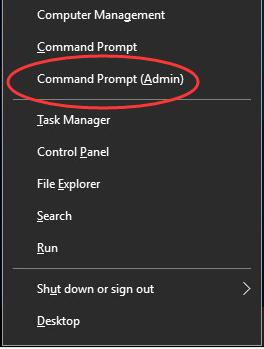
Open quick-access menu by pressing Windows key + X key.
Then click Command Prompt(Admin) to run it as administrator.
When prompted by User Account Control, click Yes.
Type the following commands and hit Enter to run them one by one:
• cd C:\Program Files
• takeown /f WindowsApps /r /d Y
• icacls WindowsApps /grant “%USERDOMAIN%\%USERNAME%”:(F) /t
• attrib WindowsApps -h
• rename WindowsApps WindowsApps.old
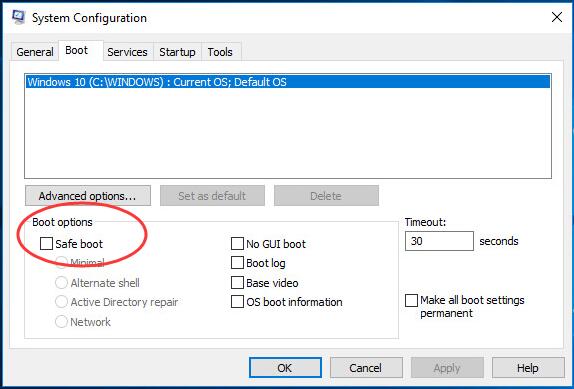
Follows the a) & b) of Step 1 to openSystem ConfigurationWindow.
This time uncheck Safe boot to reboot your Windows 10.
When it finish rebooting, run System Restore again.
Fix Two. Rename the WindowsApps folder in WinRE
Boot your Windows 10 into WinRE(Windows Recovery Environment)
How to:
a)
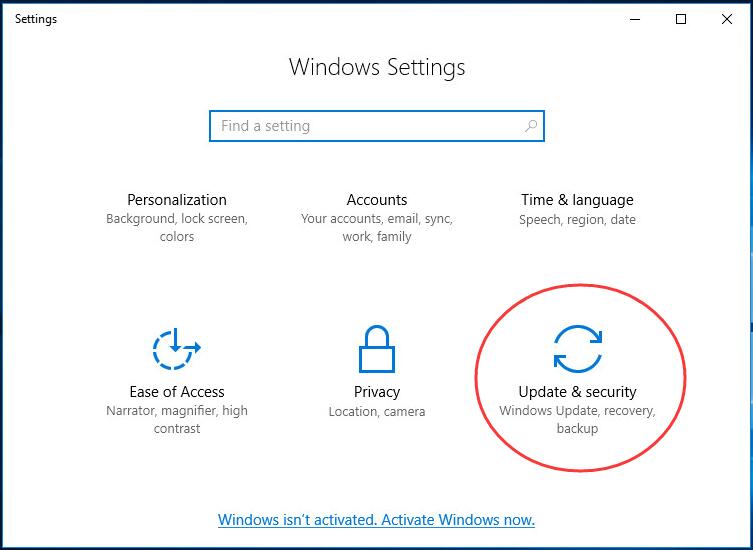
Open Settings Window by pressing Windows key + I key.
Then click Update & security.
b)
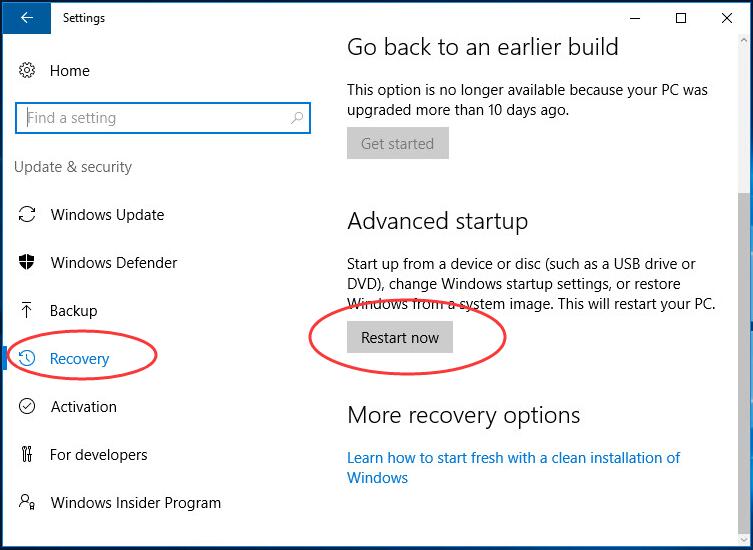
Click Recovery.
Then scroll down on the right side and click Restart now under Advanced startup .
c)
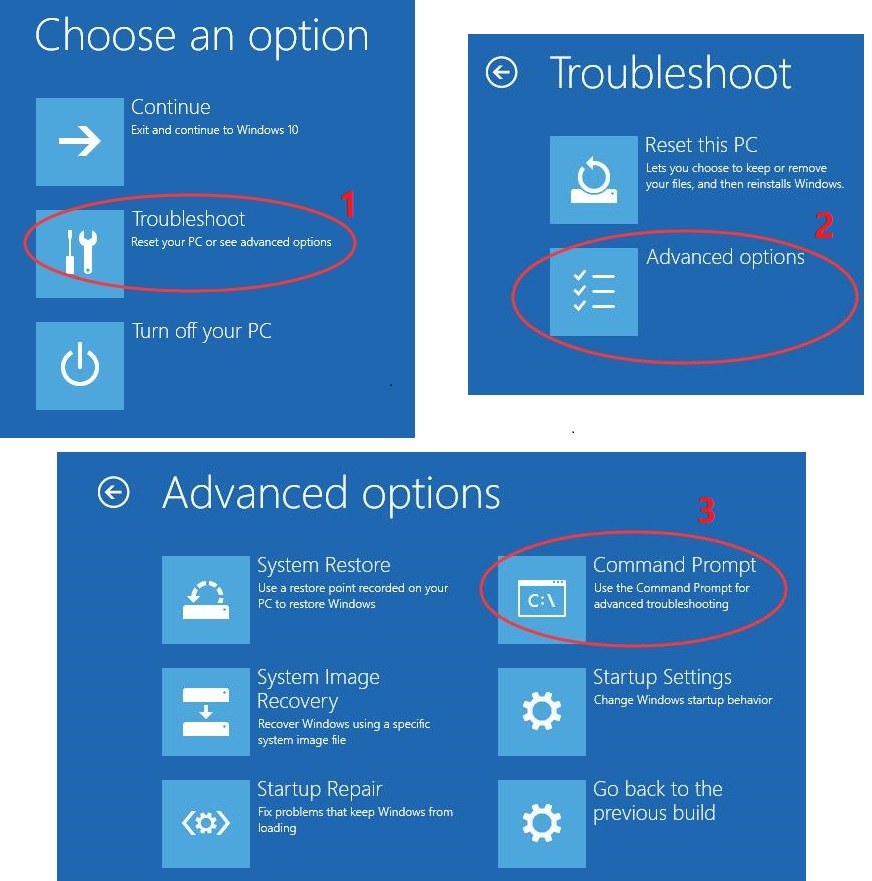
ClickTroubleshoot > Advanced >Command Prompt.
Type the following commands and hit Enter to run them one by one:
• cd C:\Program Files
• attrib WindowsApps -h
• rename WindowsApps WindowsApps.old
Reboot your Windows 10, then run System Restore again.
That’s it!
Also read:
- [New] PhotoGenius AI Suite Elevate Your Edits for 2024
- [Updated] Byte-Sized Hits The Heart of Viral Content for 2024
- 2024 Approved Navigating Cloud Data Costs Comparison & Best Price Paths
- Claude 2 Demystified: How It Works & What You Can Do
- Conversion Sans Frais : MP3 De Vidéo F4V via Movavi Online
- Convertir Archivos Alaw a Wave Sin Gastos Utilizando El Servicio De Movavi Online
- Exploring the Process of AI Transfer Learning - Key Concepts Unveiled
- Fixed Touch Deficiency - Ensured Device Interaction with HID
- In 2024, How to Unlock T-Mobile Apple iPhone 12 Pro online without SIM Card?
- MP4 File Transformation From 3GPP Made Simple and Free – Discover the Power of Movavi's Online Conversion Tool
- Seamless Intelligent Graphics Update for Windows 11
- Top 10 Reliable VHS-to-DVD Conversion Tools: Explore Movavi's Leading Position
- オンラインで自由にVOCからAVIへの高速変換 – 完全無料ソリューション
- Title: Error 0X80004005 Explained: A Deep Dive Into Correcting Unspecified Problems Successfully
- Author: Anthony
- Created at : 2025-01-02 01:33:02
- Updated at : 2025-01-06 23:05:20
- Link: https://win-howtos.techidaily.com/error-0x80004005-explained-a-deep-dive-into-correcting-unspecified-problems-successfully/
- License: This work is licensed under CC BY-NC-SA 4.0.