
Lenovo Touchpad Not Responding? Here's the Definitive Fix for Windows Users!
Trouble with Your Wireless Mouse on Windows? Here’s How to Fix It in W11/W10
Your wireless mouse may randomly stop working. This is annoying. But don’t worry, I have prepared a set of solutions for you to solve it.

Why does your wireless mouse randomly stop working?
The reasons the wireless mouse randomly stops working can be different. But figuring out reasons is the first step to fix it. Here, I summarize the following factors that may cause your mouse problems:
- Low battery power
- Damaged mouse
- Connectivity problems resulting from Bluetooth and USB port
- Missing or outdated drivers
- Realtek HD Audio Manager
- Disappearing cursor feature
- System files issues
- Hard errors
You don’t need to worry too much about the above reasons but just try the methods below to fix it.
 With Screensaver Wonder you can easily make a screensaver from your own pictures and video files. Create screensavers for your own computer or create standalone, self-installing screensavers for easy sharing with your friends. Together with its sister product Screensaver Factory, Screensaver Wonder is one of the most popular screensaver software products in the world, helping thousands of users decorate their computer screens quickly and easily.
Before getting started
Before you get started to fix the mouse problem, it is a wise choice to check your wireless mouse first.
Check the power of the wireless mouse
When the battery is emptied, your mouse will randomly stop moving. Therefore, you have to check the power of the mouse. For battery-powered wireless mouse, you can just replace the batteries and check if it works. Or if you use a rechargeable wireless mouse, charge it and check if it works.
Check if the wireless mouse is damaged
As time goes, your wireless mouse is consumed. As a result, it may be damaged. Especially, a cheap mouse may have a shorter service time. When your mouse doesn’t work, you can check if your mouse has been damaged. You can connect your mouse to another PC and see if the mouse works. Once it doesn’t work, just replace it with a new one.
Try these methods
Here are 7 methods for you to fix your mouse problem. You can just try these methods until your mouse works.
- Change USB port
- Connect to Bluetooth
- Update your mouse driver
- Disable the Realtek HD Audio Manager
- Disable disappearing cursor feature
- Fix missing or corrupt system files
- Fix unknown hard errors
Method 1: Change USB port
Your wireless mouse may come with a USB receiver. Generally, you can plug the USB receiver into a USB port on your PC and then your mouse can work. If your USB receiver is plugged into a USB port but it does not work, it may be due to the USB port. You can just try another USB port.
- Unplug the USB receiver from your PC.
- Plug the USB receiver into another USB port and see if it works.

Method 2: Add a Bluetooth device
It’s possible that your mouse works normally but it hasn’t paired with your PC. If your mouse doesn’t connect to your computer via the USB receiver, you can do it manually by adding a Bluetooth device.
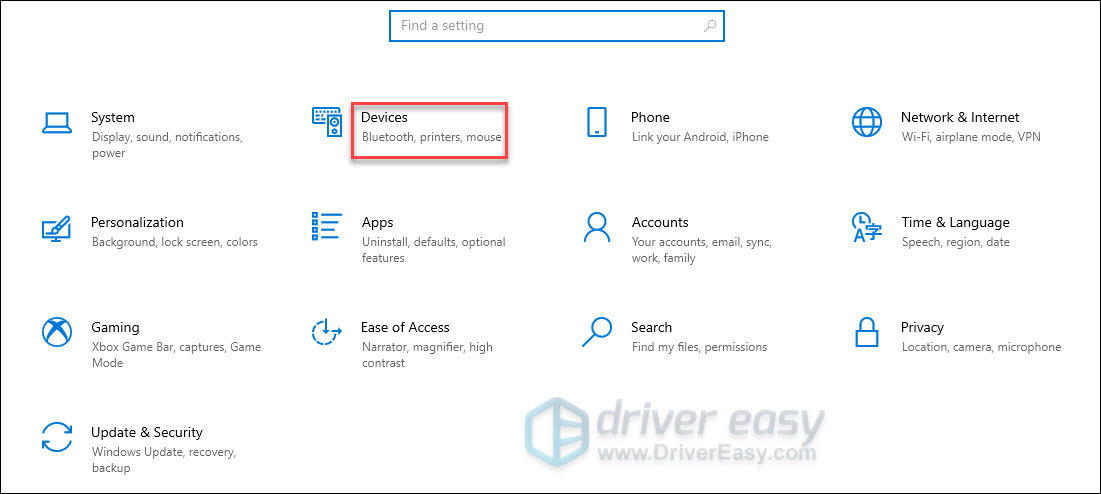
- On the keyboard, press the Windows logo key and I key at the same time to Open Settings .
- ClickDevices from the menu options.
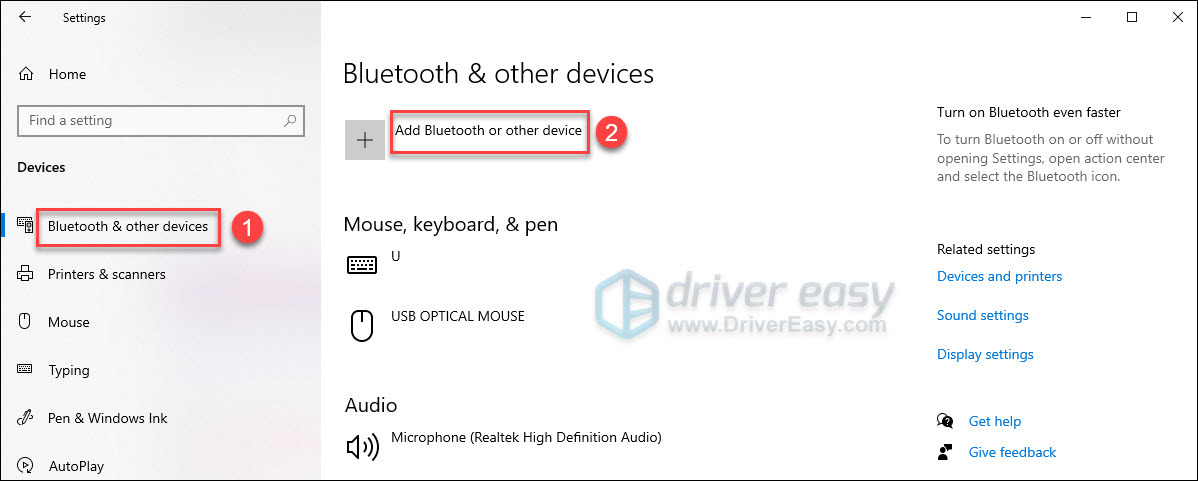
- ClickBluetooth & other devices on the left panel and then selectAdd Bluetooth or other device .
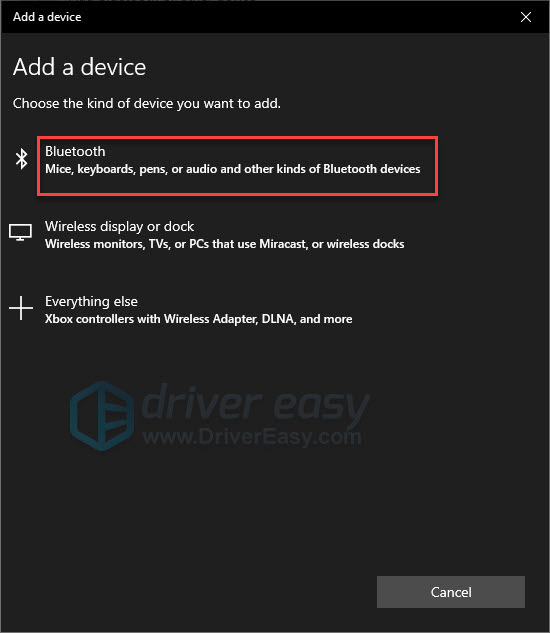
- ClickBluetooth on the dialog box below.
- You have to wait for the mouse to appear in the list and then follow the on-screen instructions to pair the device.

Method 3: Update your wireless mouse driver
If your operating system has updated but your mouse driver hasn’t updated, your mouse may stop working. So when your mouse does not work, you can try to update your mouse driver.
If you’re not comfortable playing with device drivers, we recommend using Driver Easy . Driver Easy will automatically recognize your system and find the correct drivers for it. In other words, you don’t need to know exactly what system your computer is running, you don’t need to risk downloading and installing the wrong driver, and you don’t need to worry about making a mistake when installing.
You can update your drivers automatically with either the FREE or the Pro version of Driver Easy.
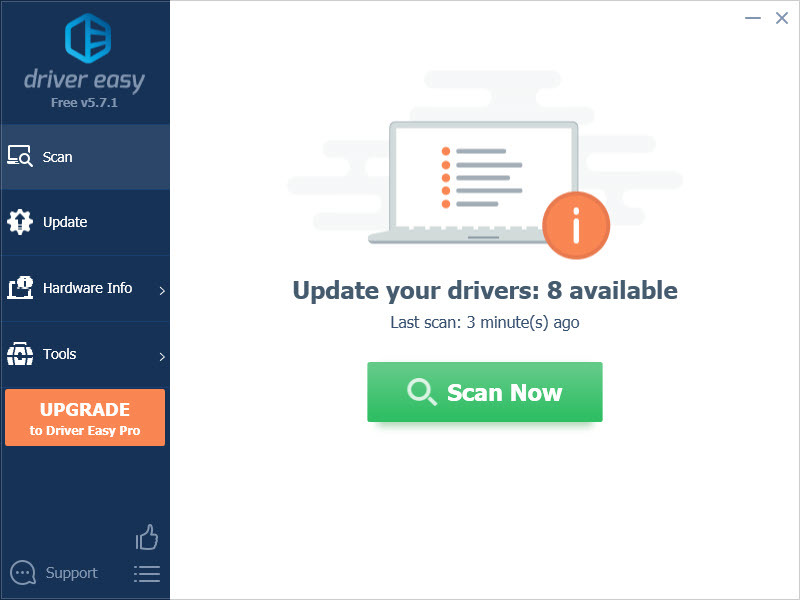
- Download and install Driver Easy.
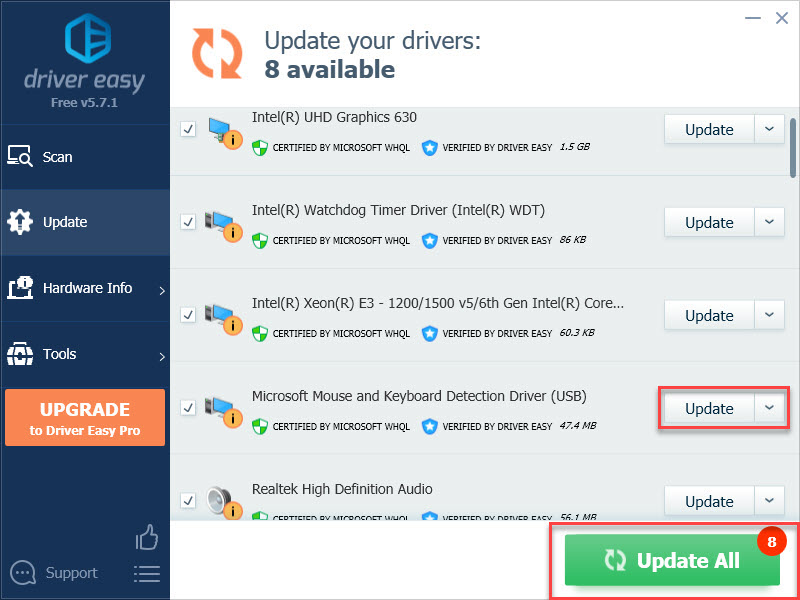
- Run Driver Easy and click theScan Now button. Driver Easy will then scan your computer and detect any drivers that need to update.
- You can choose to update the driver with a FREE version. Click theUpdate button next to the flagged driver to automatically download the correct version of that driver, then you can manually install it.
Or you can clickUpdate All to automatically download and install the correct version of all the drivers that are missing or out of date on your system. (This requires the Pro version – you’ll be prompted to upgrade when you clickUpdate All ).

After updating your device drivers, see if your mouse problem has been solved. If not, move to the next method.
Parental Control Software
### Method 4: Disable the Realtek HD Audio ManagerRealtek HD Audio Manager will start upon each bootup. It may interfere with the functionality of other devices and cause errors. If you disable theRealtek HD Audio Manager , it may help you to fix the mouse problem.
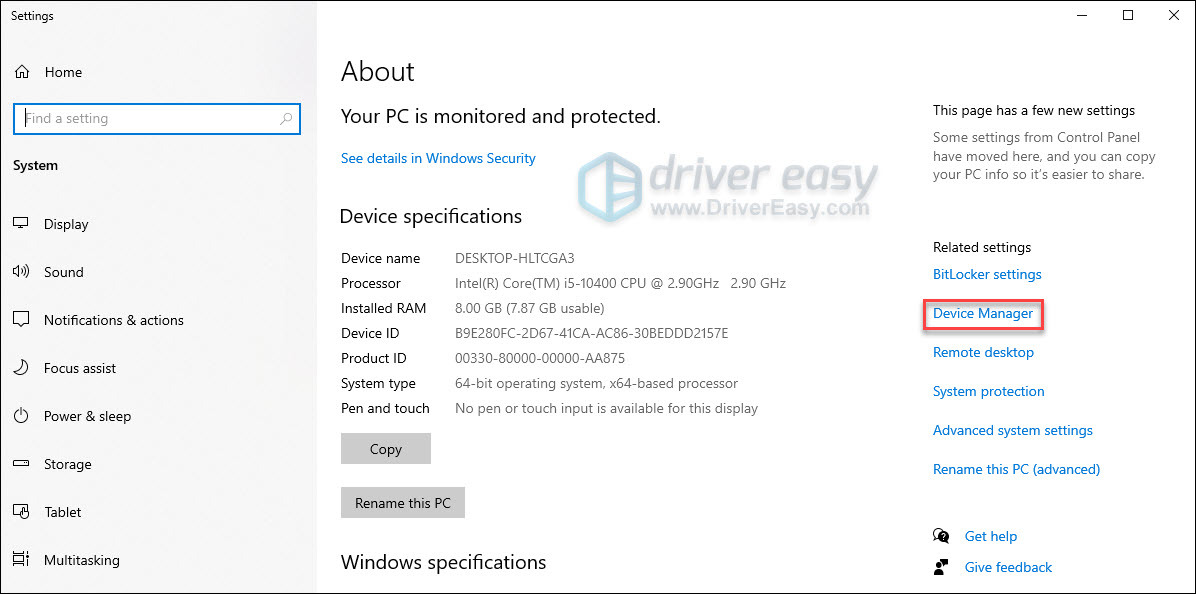
- PressWindows logo andPause key on keyboard at the same time.
- The window below will popup. Click theDevice Manager on the right panel.
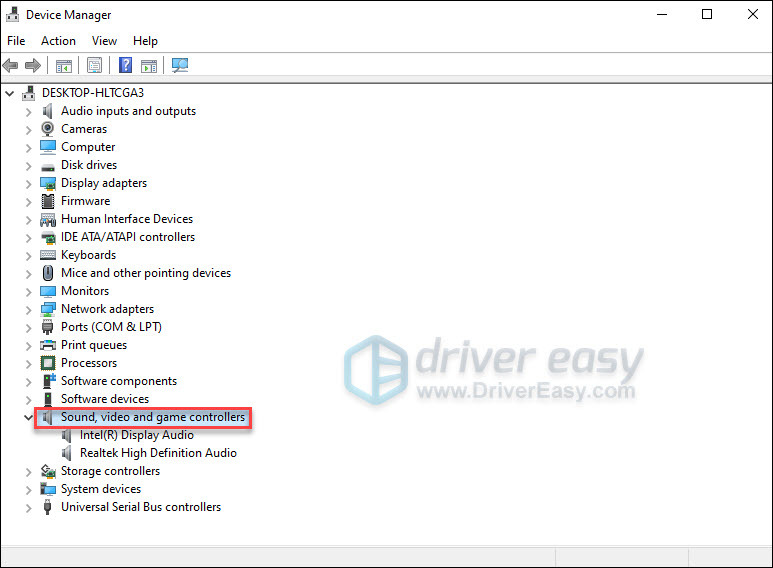
- Double-click theSound, video and game controllers to view the devices in the category.
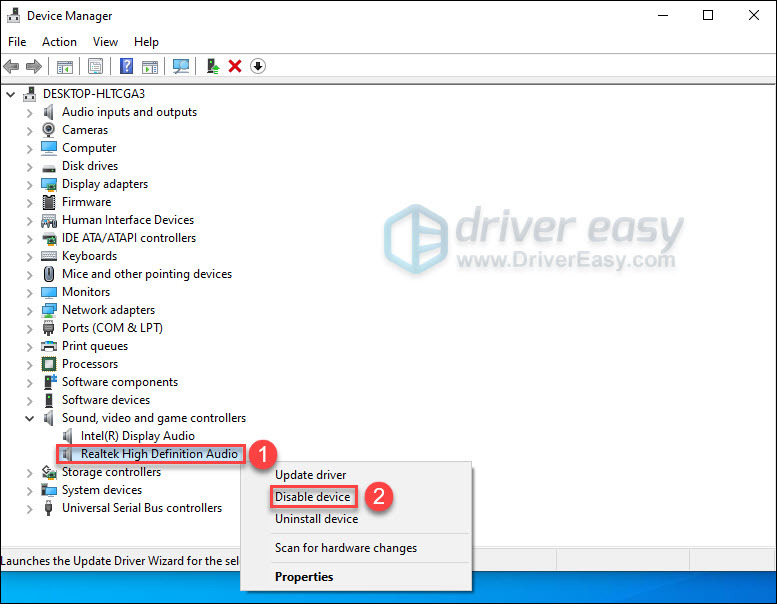
Right-clickRealtek High Definition Audio and then selectDisable device. - ClickYes in the dialog box that pops up.
Epubor Audible Converter for Mac: Download and convert Audible AAXC/AA/AAX to MP3 with 100% original quality preserved.
- After disablingRealtek High Definition Audio, you can check if your mouse works.
 Epubor Audible Converter for Mac: Download and convert Audible AAXC/AA/AAX to MP3 with 100% original quality preserved.
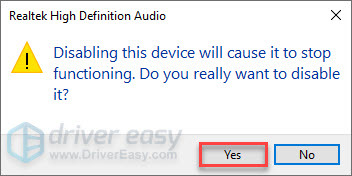
Method 5: Disable disappearing cursor feature
The disappearing cursor feature is user-friendly. It is designed for user convenience while typing. If your cursor disappears only when you’re typing, you can check if the feature is enabled. You can fix it by disabling this feature.
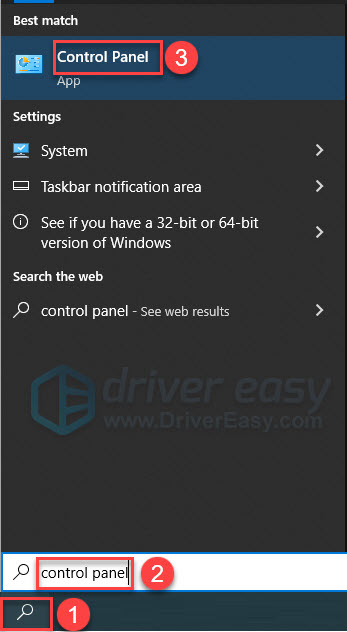
- Click theSearch box in the lower left corner of your screen and then typecontrol panel . Click theControl Panel .
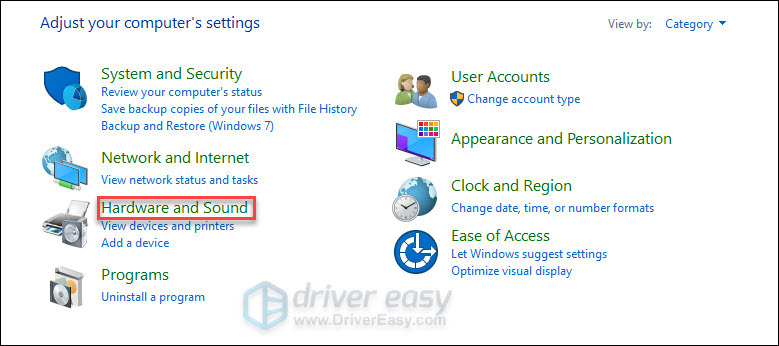
Epubor Ultimate for Win:Helps you read books anywhere, including the best eBook Converter + eBook DRM Removal functions. - The window below will pop up. ClickHardware and Sound .
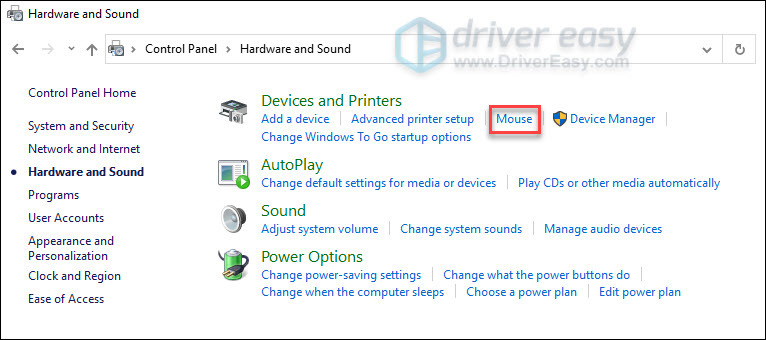
- ClickMouse below theDevices and Printers .
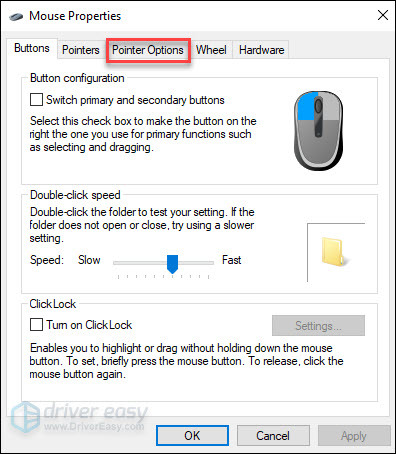
- TheMouse Properties dialog box will open. Click thePointer Options tab on the upper side of the window.
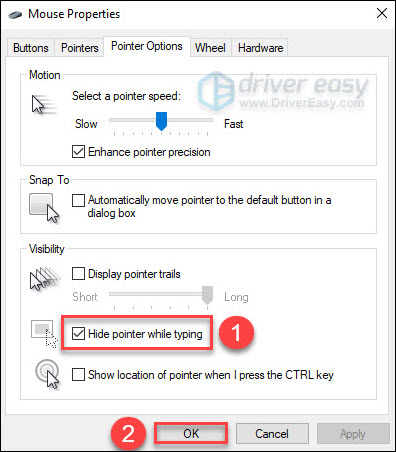
- Uncheck the box next to theHide pointer while typing and click theOK button.
- Restart your PC and see if your mouse works.

Method 6: Fix missing or corrupt system files
System files may be missed or corrupted while you install or uninstall software, updates, and hardware drivers. When your mouse randomly stops working, you can check if there are corrupted system files. You can try to fix missing or corrupt system files by running the Command Prompt.
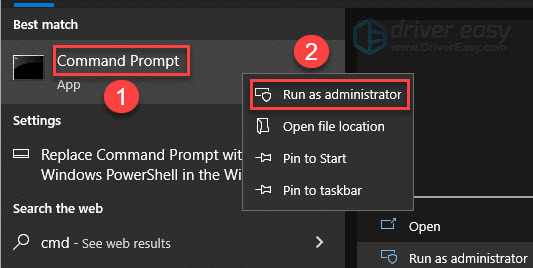
- Click theSearch box and then typecmd .
- Right-clickCommand Prompt and then selectRun as administrator .
Power Tools add-on for Google Sheets, 12-month subscription
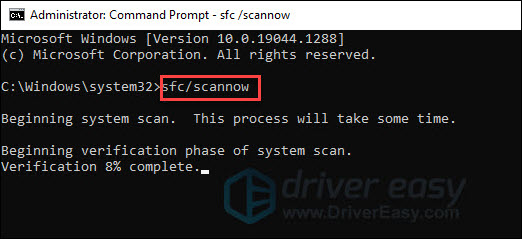
- In the black window that pops up, typesfc/scannow (you can just copy and paste it) and then pressEnter . It will take some time to scan system files. For corrupted system files, it will repair them.
- After that, you can see if your mouse works.

 SwifDoo PDF 2-Year Plan
Method 7: Fix unknown hard errors
Unknown hard errors can also be the possible cause. If you have tried all the above methods, your wireless mouse still doesn’t work. You can try to fix unknown hard errors with Windows built-in toolCHKDSK .
- PressCtrl+Shift+Esc keys on keyboard at the same time to open the Task Manager.
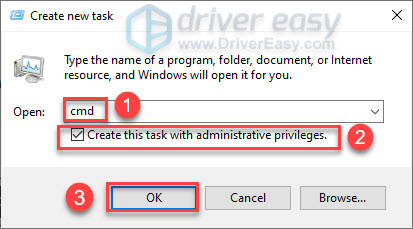
- Click theFile tab and then selectRun new task .
- The dialog box will pop up. Typecmd and check the box next to theCreate this task with administrative privileges . Then Click theOK button.
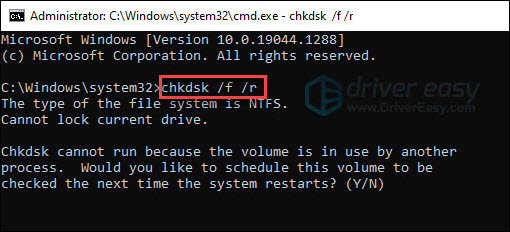
- Typechkdsk /f /r (you can just copy and paste it) in the Command Prompt window and then pressEnter .
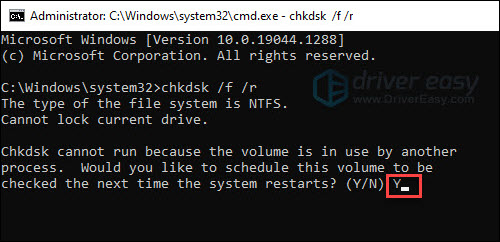
- PressY on your keyboard. As is described in the figure below, Disk check will start the next time when you boot your PC.


It might take some time to check the hard disk. If you don’t have time to wait for the disk check to complete in your next reboot, you can skip it and reschedule it again.
In short, I hope this article is helpful to you. For any questions, please feel free to leave a comment below.
- Title: Lenovo Touchpad Not Responding? Here's the Definitive Fix for Windows Users!
- Author: Anthony
- Created at : 2024-08-19 07:37:48
- Updated at : 2024-08-20 07:37:48
- Link: https://win-howtos.techidaily.com/1723210376963-lenovo-touchpad-not-responding-heres-the-definitive-fix-for-windows-users/
- License: This work is licensed under CC BY-NC-SA 4.0.